Flutter has a strength that only a handful of frameworks have: the power to build a multi-platform application with a single codebase.
What if you need to display some videos in your new or future worldwide famous app? At the time I write this article, it’s fair to say that there aren’t many video players available for Flutter out there. Here comes our solution at api.video!
A single video player for all platforms
If you’re new to Flutter or cross-platform development, welcome to this wonderful, fast, and simple world! No more separate logics or codebase to create an application that works across multiple platforms. Better yet, no need to have multiple developers working to create different applications for various operating systems. Create an application once, and use it everywhere!
The api.video player for Flutter is built natively for Android, iOS, and web and can be implemented on these three platforms easily. All you need is a computer and an api.video account.
Continue reading this article for a full tutorial 👀
Upload a video to display it
In order to display a video, you need to first upload it! To upload a video, login to your api.video account or if you are not registered already, you can easily create an account for free.
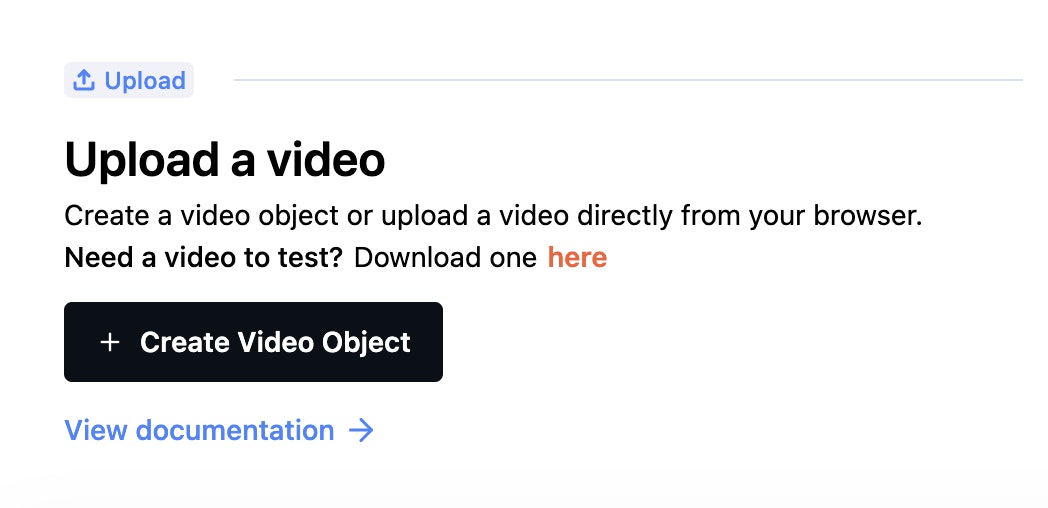
Once you reach the dashboard, check if you have previously uploaded any videos, and if not, no worries! You can easily upload a video by clicking the “Create Video Object” button on the overview and follow the steps on the dashboard.
💡 You can also upload videos to your workspace with one of our SDKs
Upload a video on api.video dashboard
Add the api.video player to your application on Flutter
If you’re new to Flutter, or if you don’t already have a Flutter app running, please follow the official guide.
Once your application is running, add the api.video player package to you Flutter.
Option 1
Run the following command at the root of your project:
flutter pub add apivideo_playerOption 2
Modify your project’s pubspec.yaml file:
dependencies:
  flutter:
    sdk: flutter
  # Add the following line
  apivideo_player: ^1.0.0
For web usage
If your application is or will be used as a web app, you need to add the api.video PlayerSdk script to the web/index.html file of your project.
<!DOCTYPE html>
<html>
  <head>
    ...
    <!-- Add the following line inside of the head tag -->
    <script src="https://unpkg.com/@api.video/player-sdk" defer></script>
  </head>

  <body>
    ...
  </body>
</html>
For iOS usage
This package only works on iOS 13 and above. Please update your ios/Podfile platform property as follows, or update the iOS version in xCode.
platform :ios, '13.0'Display your first video
You can display your first video by following the easy steps below 👇
1. Import the package
Add the following line at the top of the file where you want to use the api.video player:
import 'package:apivideo_player/apivideo_player.dart';2. Create a new video player controller
You need to first instantiate a ApiVideoPlayerController to be able to use the video player widget.
To instantiate the ApiVideoPlayerController, you will need an api.video video id. Find the video id in the api.video dashboard by clicking on one of your videos found under the section called videos.
Create a new widget or modify an existing one like this:
class MyWidget extends StatefulWidget {
const MyWidget({super.key});
State<MyWidget> createState() => _MyWidgetState();
}
class _MyWidgetState extends State<MyWidget> {
// Add this line with a real video id to instantiate a new ApiVideoPlayerController
final ApiVideoPlayerController _controller = ApiVideoPlayerController(
videoOptions: VideoOptions(videoId: 'YOUR_VIDEO_ID'),
);
void initState() {
super.initState();
// Initialize the controller
_controller.initialize();
}
Widget build(BuildContext context) {
return const MaterialApp(
home: Scaffold(
body: Text("Soon, there will be a video player here!"),
),
);
}
}Run your application on the device of your choice and a simple line of text should appear on your application.
3. Create a new video player
Now that you have a functional ApiVideoPlayerController, you can create a new ApiVideoPlayer and associate your controller to the player.
Modify your widget by replacing the Text widget with an ApiVideoPlayer one:
class MyWidget extends StatefulWidget {
const MyWidget({super.key});
State<MyWidget> createState() => _MyWidgetState();
}
class _MyWidgetState extends State<MyWidget> {
// Add this line with a real video id to instantiate a new ApiVideoPlayerController
final ApiVideoPlayerController _controller = ApiVideoPlayerController(
videoOptions: VideoOptions(videoId: 'YOUR_VIDEO_ID'),
);
void initState() {
super.initState();
// Initialize the controller
_controller.initialize();
}
Widget build(BuildContext context) {
return MaterialApp(
home: Scaffold(
body: ApiVideoPlayer(
controller: _controller,
),
),
);
}
}4. Make it yours!
You can customize your brand new video player the way you want by changing its colors and adding some event listeners.
Add some event listeners
There are two ways to add an event listener to your video player controller:
- When you instantiate the player controller
final ApiVideoPlayerController _controller = ApiVideoPlayerController(
  videoOptions: VideoOptions(videoId: 'YOUR_VIDEO_ID'),
  onPlay: () => print('PLAY'), // When the video will be played, a "PLAY" message will be displayed in the console
);- After the player controller has been initialized.
_controller.addEventsListener(
  ApiVideoPlayerEventsListener(
    onPause: () => print('PAUSE'), // When the video will be paused, a "PAUSE" message will be displayed in the console
  ),
);
The following sample code shows you how to add an onPlay event listener on ApiVideoPlayerController instantiation and an onPause event listener after the controller has been initialized in the initState method.
Modify your code like this to test these two event listeners:
class MyWidget extends StatefulWidget {
const MyWidget({super.key});
State<MyWidget> createState() => _MyWidgetState();
}
class _MyWidgetState extends State<MyWidget> {
// Add this line with a real video id to instantiate a new ApiVideoPlayerController
final ApiVideoPlayerController _controller = ApiVideoPlayerController(
videoOptions: VideoOptions(videoId: 'YOUR_VIDEO_ID'),
onPlay: () => print('PLAY'), // When the video will be played, a "PLAY" message will be displayed in the console
);
void initState() {
super.initState();
// Initialize the controller
_controller.initialize();
_controller.addEventsListener(
ApiVideoPlayerEventsListener(
onPause: () => print('PAUSE'), // When the video will be paused, a "PAUSE" message will be displayed in the console
),
);
}
Widget build(BuildContext context) {
return MaterialApp(
home: Scaffold(
body: ApiVideoPlayer(
controller: _controller,
),
),
);
}
}Customize the theme of your player
You can change your video player’s colors by attributing a PlayerTheme class to the theme parameter of your ApiVideoPlayer widget:
class MyWidget extends StatefulWidget {
const MyWidget({super.key});
State<MyWidget> createState() => _MyWidgetState();
}
class _MyWidgetState extends State<MyWidget> {
// Add this line with a real video id to instantiate a new ApiVideoPlayerController
final ApiVideoPlayerController _controller = ApiVideoPlayerController(
videoOptions: VideoOptions(videoId: 'YOUR_VIDEO_ID'),
onPlay: () => print('PLAY'), // When the video will be played, a "PLAY" message will be displayed in the console
);
void initState() {
super.initState();
// Initialize the controller
_controller.initialize();
_controller.addEventsListener(
ApiVideoPlayerEventsListener(
onPause: () => print('PAUSE'), // When the video will be paused, a "PAUSE" message will be displayed in the console
),
);
}
Widget build(BuildContext context) {
return MaterialApp(
home: Scaffold(
body: ApiVideoPlayer(
controller: _controller,
// This theme allows you to customize the player's colors the way you want
theme: const PlayerTheme(
controlsColor: Colors.yellow,
activeTimeSliderColor: Colors.blue,
inactiveTimeSliderColor: Colors.pink,
),
),
),
);
}
}Go further
You can access and control the video player features such as the play button, reverse, or forward features from outside of the player.
Let’s see how we can retrieve the video’s information and control our video player from elsewhere.
Retrieve the video’s information
The ApiVideoPlayerController gives you access to a lot of information about the current video: duration, current time, volume, and many more.
Let’s add a simple button to retrieve the current video duration.
Modify your widget as follows:
class MyWidget extends StatefulWidget {
const MyWidget({super.key});
State<MyWidget> createState() => _MyWidgetState();
}
class _MyWidgetState extends State<MyWidget> {
// Add this line with a real video id to instantiate a new ApiVideoPlayerController
final ApiVideoPlayerController _controller = ApiVideoPlayerController(
videoOptions: VideoOptions(videoId: 'YOUR_VIDEO_ID'),
onPlay: () => print('PLAY'), // When the video will be played, a "PLAY" message will be displayed in the console
);
void initState() {
super.initState();
// Initialize the controller
_controller.initialize();
_controller.addEventsListener(
ApiVideoPlayerEventsListener(
onPause: () => print('PAUSE'), // When the video will be paused, a "PAUSE" message will be displayed in the console
),
);
}
Widget build(BuildContext context) {
return MaterialApp(
home: Scaffold(
body: Column(
children: [
SizedBox(
width: 400.0,
height: 300.0,
child: ApiVideoPlayer(
controller: _controller,
// This theme allows you to customize the player's colors the way you want
theme: const PlayerTheme(
controlsColor: Colors.yellow,
activeTimeSliderColor: Colors.blue,
inactiveTimeSliderColor: Colors.pink,
),
),
),
TextButton(
child: const Text('Get video duration'),
onPressed: () async => print(await _controller.duration), // Press this button to get the video's duration printed in your console
)
],
),
),
);
}
}Control the video from outside of the player
You can control the video player from outside of the player thanks to the controller methods.
For instance, we can add an icon button to mute and unmute the video on press.
Modify your widget as follows:
class MyWidget extends StatefulWidget {
const MyWidget({super.key});
State<MyWidget> createState() => _MyWidgetState();
}
class _MyWidgetState extends State<MyWidget> {
// Add this line with a real video id to instantiate a new ApiVideoPlayerController
final ApiVideoPlayerController _controller = ApiVideoPlayerController(
videoOptions: VideoOptions(videoId: 'YOUR_VIDEO_ID'),
onPlay: () => print('PLAY'), // When the video will be played, a "PLAY" message will be displayed in the console
);
void initState() {
super.initState();
// Initialize the controller
_controller.initialize();
_controller.addEventsListener(
ApiVideoPlayerEventsListener(
onPause: () => print('PAUSE'), // When the video will be paused, a "PAUSE" message will be displayed in the console
),
);
}
Widget build(BuildContext context) {
return MaterialApp(
home: Scaffold(
body: Column(
children: [
SizedBox(
width: 400.0,
height: 300.0,
child: ApiVideoPlayer(
controller: _controller,
// This theme allows you to customize the player's colors the way you want
theme: const PlayerTheme(
controlsColor: Colors.yellow,
activeTimeSliderColor: Colors.blue,
inactiveTimeSliderColor: Colors.pink,
),
),
),
TextButton(
child: const Text('Get video duration'),
onPressed: () async => print(await _controller.duration), // Press this button to get the video's duration printed in your console
),
IconButton(
icon: const Icon(Icons.volume_off),
onPressed: () => _controller.setIsMuted(true), // Press this button to mute the video
)
],
),
),
);
}
}Full documentation and example
Find the full documentation and a full sample app in our GitHub repository.
If you're looking for an easy way to integrate video into your application, check out our docs and sign up for a free account.
Follow our latest news by subscribing to our newsletter
Create your free account
Start building with video now


