Live stream with OBS and api.video
February 23, 2021 - Erikka Innes in Player, live - create, Python
Today we'll use OBS (Open Broadcaster Software), the api.video API, and Python to set up a live stream! A common interest people have right away is being able to live stream straight from the browser. If this is something you need, you'll want to check out this demo - livestream.a.video - instead of this tutorial. There are various reasons that live streaming from the browser isn't common, but explaining why is beyond the scope of this tutorial. So if you're ready, onwards! Let's set up our own live stream!
A quick note before we get started - you can create and view your live stream without doing any coding. However, at the very end, if you want to add your live stream to your own custom web page, you do use a tiny bit of code. It's an extra step you can take if you want. Otherwise stick with the other sections for a no-code experience!
If you are interested in the coding aspects, you can check out our live stream API reference documentation.
Prerequisites
For this project you'll need:
- OBS - we will install as part of the walk through, so don't worry if you don't have it yet
- api.video account and API key (for this tutorial, we're using the production key, which requires a paid account - but everything will work with your sandbox key if you prefer)
- Mac - you can also use a PC, but this tutorial is geared towards a Mac so you'll need to make adjustments as needed
- Video camera - if you have a Mac, we'll use the built-in camera. If you don't have something built in, you'll need to have something else available and it will probably require a bit more set up than what's described here. Ask our community forum for help.
If you've got your prerequisites in order, let's get started!
Create a player and a live stream
We'll want a player for our live stream, and you'll also want to associate your player with your live stream when we create the live stream. You don't have to use an api.video player if you don't want to, but for the purposes of the walk through, we will.
- Log in to your api.video account.
- At the top of the dashboard, click My videos. You're taken to go.api.video.
- At the top of the screen, click Players. You're taken to the Players screen.
- Click the +Add Player button. You're taken to the Add a player screen.
- You can choose how you want to configure your player here, from choosing colors for the different parts of the player, to details about whether the player is accessible via API and more. For our walk through, leave the settings to their default arrangement. Click Save player.
- Make a note of the player ID or leave this screen open while we work on other parts of the project.
- Go back to the dashboard, which is the screen you first see when you log into your api.video account.
- At the top of the dashboard, click My videos. A screen offering tabs for Videos, Live and Players opens.
- Click Live.
- Click Create a live stream. The Edit a live stream screen opens.
- In the Name field, put a name for your live stream. I'm going to call mine 'Bob.'
- Leave Player id blank.
- Click Save livestream. What we've done, is set up our live stream. We can't use it just yet, but we're almost there.
- Click on the live stream you just created. You'll be able to see all kinds of details about the live stream. We're going to need a few pieces of information from this screen, so leave it open. Of particular importance is the Stream key and the RTMP Server Url. Leave this page open, and let's get OBS ready.
Install and configure Open Broadcast Studio
Now we need to set up OBS so we can get our live stream.
- Navigate to obsproject.com.
- Choose the product appropriate for your operating system. This tutorial will focus on the mac version. Click macOS 10.13+.
- Install the dmg file, drag the icon over to applications, and open OBS.
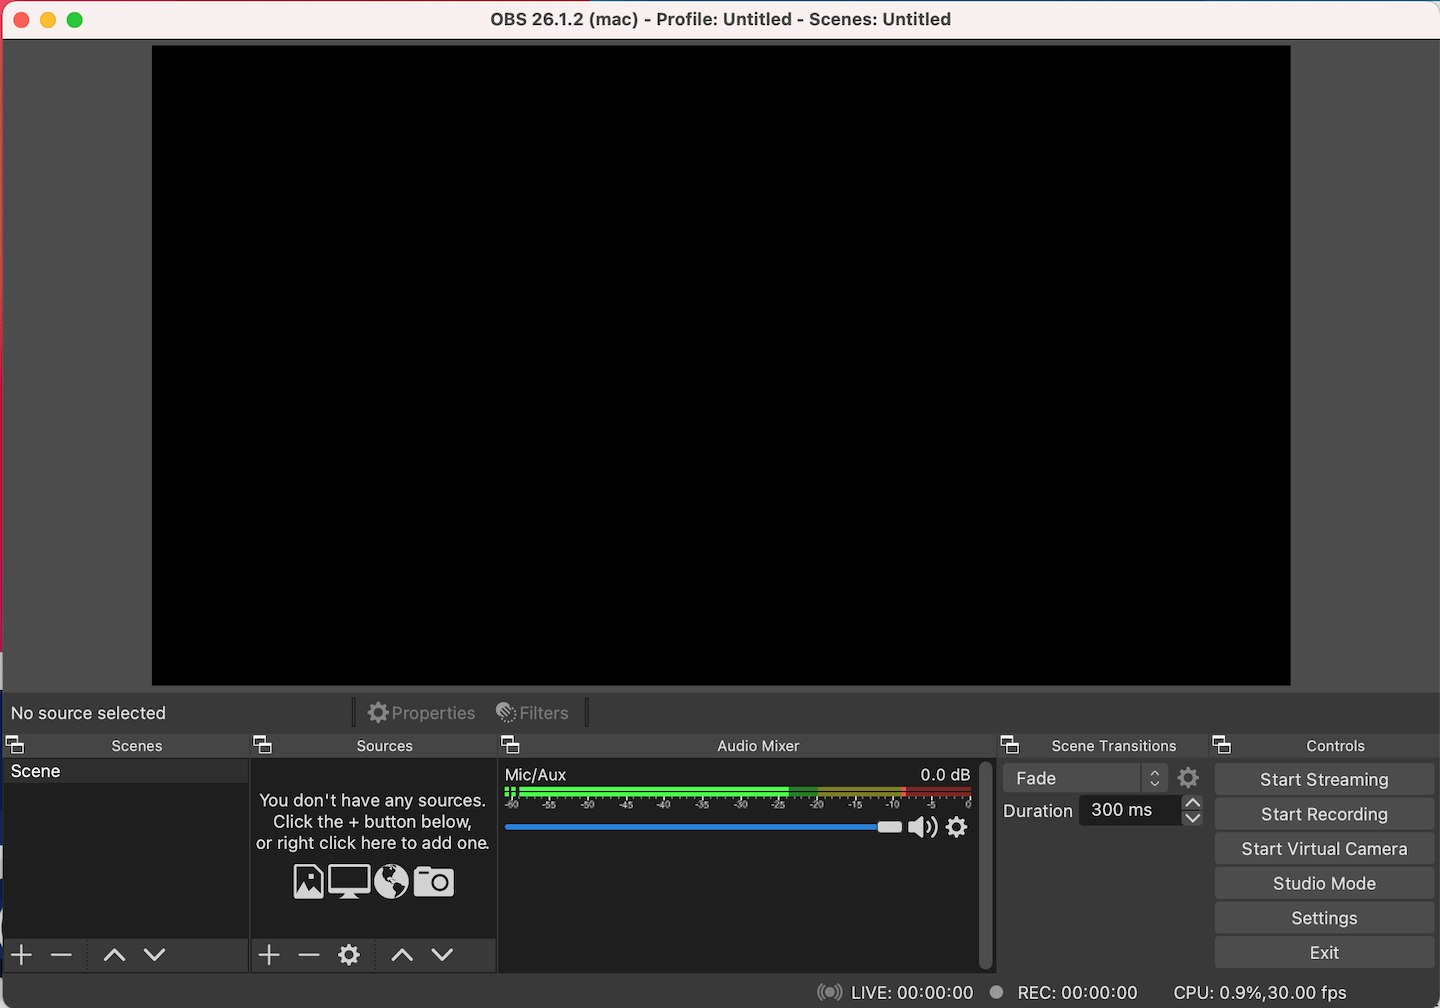
- When you open OBS for the first time after installation, it offers a configuration wizard. This wizard doesn't reappear on its own again, but it can be accessed by clicking Tools at the top of the screen and choosing Auto-Configuration Wizard. (We are going to use the wizard, because it does some configuration for you that's useful if it's your first time using OBS.)
- Whether you opened automatically on the wizard, or you clicked Tools and chose the wizard, the next step is to choose how you want your OBS set-up optimized. Because we're going to do live streaming, choose Optimize for streaming, recording is secondary.
- Click Next.
- The wizard shows you some settings it's selected for you. Leave them as-is and click Next.
- Now it's time to add your stream information. We left the api.video dashboard open on the page where you set up your live stream. Go back and grab the server information rtmp://broadcast.api.video/s. Enter that in the Server field in the OBS wizard.
- Retrieve the stream key from the api.video dashboard and enter that in the Stream Key field in the OBS wizard. Leave the dashboard open, we'll be coming back again.
- Click Next. You'll be notified that a bandwidth test is about to start. Running the test is a good way to optimize your configuration, and make sure you can contact the api.video rtmp server.
- Click Yes. A screen that looks like static will appear behind the wizard. You'll see information presented as OBS completes different test results. The final output will tell you the settings you should use for your system. For this walk through, accept the suggested settings. You can manually set them later if you want something different.
- Click Apply Settings.
- Before we move on, you may have had the experience where you couldn't connect to the api.video server. If this happens, often the problem is that OBS is being blocked by a firewall, or similar issue. Some things to check are your VPN settings, any firewall settings that are directly on your computer or network, and any firewall settings that might be on your router. We can't specifically list steps to take to solve this because all set ups are different. If your issue happens to be on your router, you need to log in and figure out how to change security to allow OBS through.
Create a Source
Now we need to configure what we'll be streaming from. For simplicity's sake, we're going to use the built-in camera that comes with your Mac. If you have a PC or another reason that you want to use a different camera, you'll have to connect it and tweak these steps as needed to continue.
- Under Sources, click the + button.
- Choose Video Capture Device. You'll get a pop up asking if you want to create a new device.
- Choose Create new and name your device.
- Click OK.
- Choose your device from the Device drop-down. For this walk through, it will be FaceTime HD Camera (Built-in). If it's working, you should immediately see what the device sees. If you are using a different camera, make sure it's on, and you are able to see what it sees through OBS.
Start Streaming
It's time to start streaming!
- Click Start Streaming. If it's working, it'll switch to saying 'Stop Streaming.' You'll see streaming health at the bottom of the screen - how many kb per second, and a square that's either green, yellow, or red. Green is healthy and means things are going well. Yellow means things have slowed a bit, and Red means things have slowed a lot.
- To check out your live stream, go to the api.video dashboard and press the Play icon on your live stream. If all goes well it should start up!
- If you like, you can now add the embed link or iframe to a web page and watch your stream that way. You can also open the stream as a link in the browser and watch it there!
Stream in Your Own Web Page with a Player
If you want to generate your own web page to stream in, we'll use a tiny bit of Python code and HTML.
Here's the code sample:
'''A simple program to create an html file from a given string,
and call the default web browser to display the file.'''

contents = '''<!DOCTYPE html PUBLIC "-//W3C//DTD HTML 4.01 Transitional//EN">
<html>
<head>
  <meta content="text/html; charset=ISO-8859-1"
 http-equiv="content-type">
  <title>Hello</title>
</head>
<body>
Hello, World!
<iframe src="REPLACE THE WHOLE IFRAME SECTION WITH A CUT N' PASTE OF THE ONE FROM YOUR LIVE STREAM IN THE DASHBOARD" width="100%" height="100%" frameborder="0" scrolling="no" allowfullscreen="true"></iframe>
</body>
</html>
'''

def main():
    browseLocal(contents)

def strToFile(text, filename):
    """Write a file with the given name and the given text."""
    output = open(filename,"w")
    output.write(text)
    output.close()

def browseLocal(webpageText, filename='tempBrowseLocal.html'):
    '''Start your webbrowser on a local file containing the text
    with given filename.'''
    import webbrowser, os.path
    strToFile(webpageText, filename)
    webbrowser.open("file:///" + os.path.abspath(filename)) #elaborated for Mac

main()
To run this, we've used a sample web page from here.
What the code is doing, is building a web page from a string. You pass a string that consists of the HTML code you need for a simple web page to the function browseLocal. In browseLocal, you write the string to a new html file, import what you'll need to present a web page, then open the web page by opening your new html file. The strToFile function is used to write the string to the html file you open. Cool huh?
This is it for live streaming today. If you want to do more with your live stream (for example if you want to delete it), you'll need to work with the API. We'll live stream using python in a future post!
If you have any questions or suggestions, please join our community forum.
You May Also Like...
- Live Stream to the Browser with FFMPEG CLI and Python - Quickly create sample code that lets you start a livestream and display it in your browser.
- Live Stream From Your Android Phone - Use a free app from Google Play to live stream from your Android phone.
- Secure Live Streams with a Unique Overlay - Learn how to secure your live streams with a watermark that's unique to each viewer.
Erikka Innes
Developer Evangelist
Follow our latest news by subscribing to our newsletter
Create your free account
Start building with video now


