api.video Strapi Plugin: Add videos to your headless CMS.
December 8, 2022 - Mathieu Thiry in video api, api video plugin, strapi, JavaScript, Typescript, React
Strapi is a headless CMS used to develop websites, mobile applications, eCommerce sites, and APIs. Strapi allows you to create an API without knowing anything about backend development or databases.
Today, we're pleased to announce our new plugin on the Strapi marketplace 🎊. A powerful, easy, and secure way to bring video content to your websites and applications using the Strapi interface.
In this tutorial, we will focus on how to use the api.video plugin, and provide a basic example on how to integrate the api.video plugin into your project.
Install the api.video plugin for Strapi
Take a look at the following video which goes through the following:
- How to install the api.video uploader on your Strapi CMS with a few simple steps.
- How to add your api.video key to the Strapi CMS to connect your accounts.
You will need to have your instance of Strapi installed. If you haven’t installed a Strapi project yet follow this guide.
We are going to install the api.video uploader Strapi plugin in this step. Run the following command from within the project root of Strapi.
# Installation
npm i @api.video/strapi-uploader-plugin
# or
yarn add @api.video/strapi-uploader-plugin@latest

# launch again the app
yarn strapi develop
# or
npm run strapi develop
🎉 Congrats, the api-video-uploader plugin should appear in the Plugins section of Strapi sidebar after you run app again.
Connect your api.video API Key
Before getting started, you will need to obtain an API Key which can be generated from the api.video dashboard.
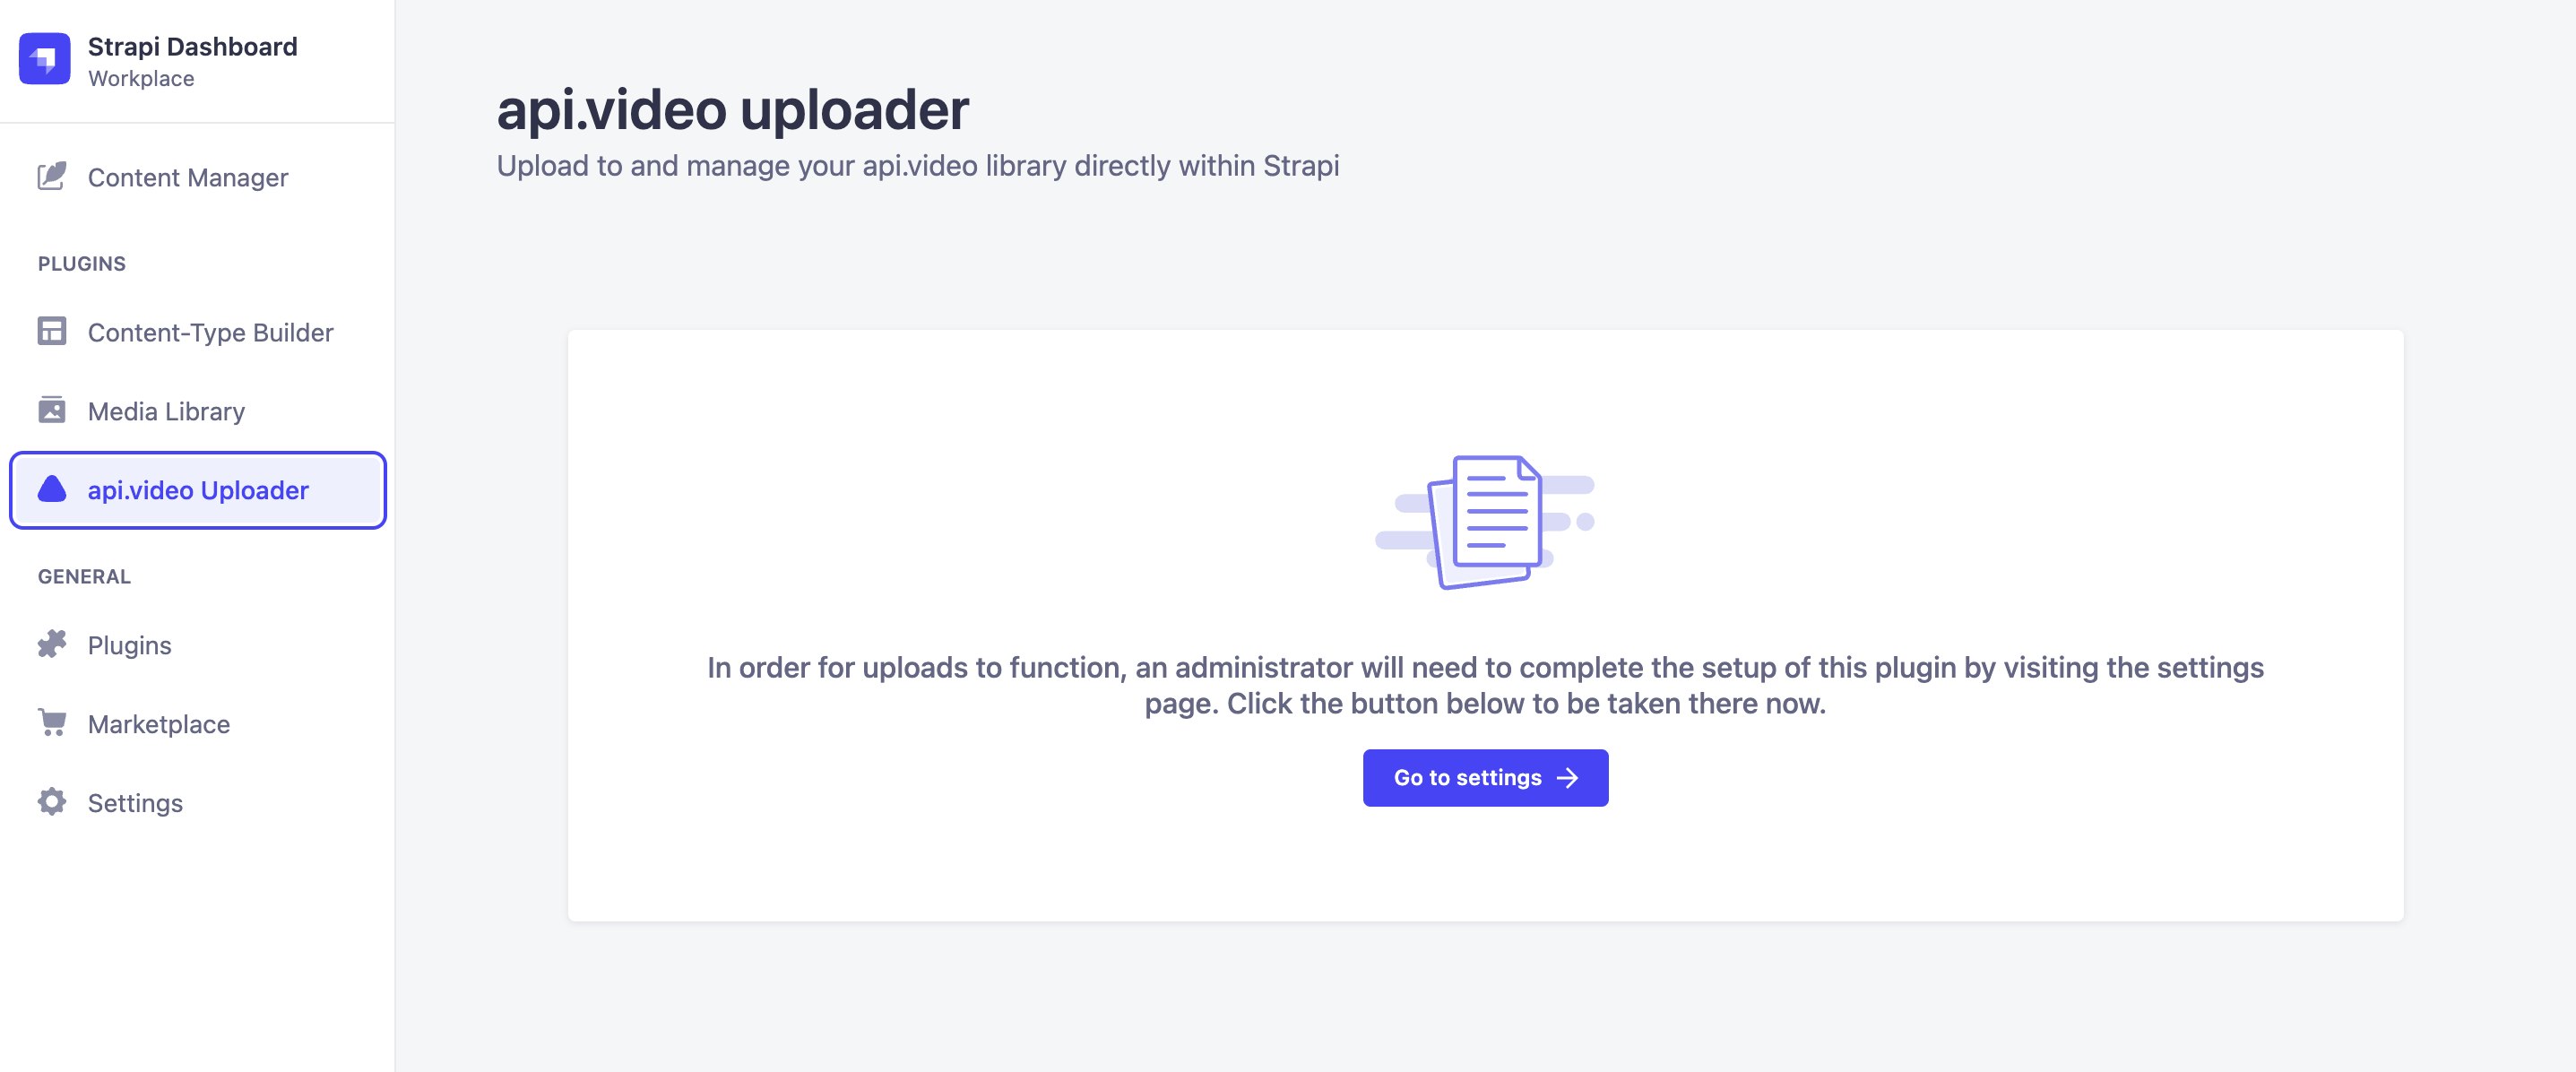
On your Strapi dashboard, you will see the api.video uploader on the left side. Click on the api.video uploader and you will see the Go to settings button. Enter your API Key you have obtained on your api.video dashboard and copy it here.
Now you are all set to upload your videos 🎖️
Manage and integrate your videos
Take a look at the following video which goes through the following:
- How to add, update, and delete your videos on the api.video uploader in your Strapi CMS.
- How to integrate your videos into your application using the Postman application for testing.
Upload your first video
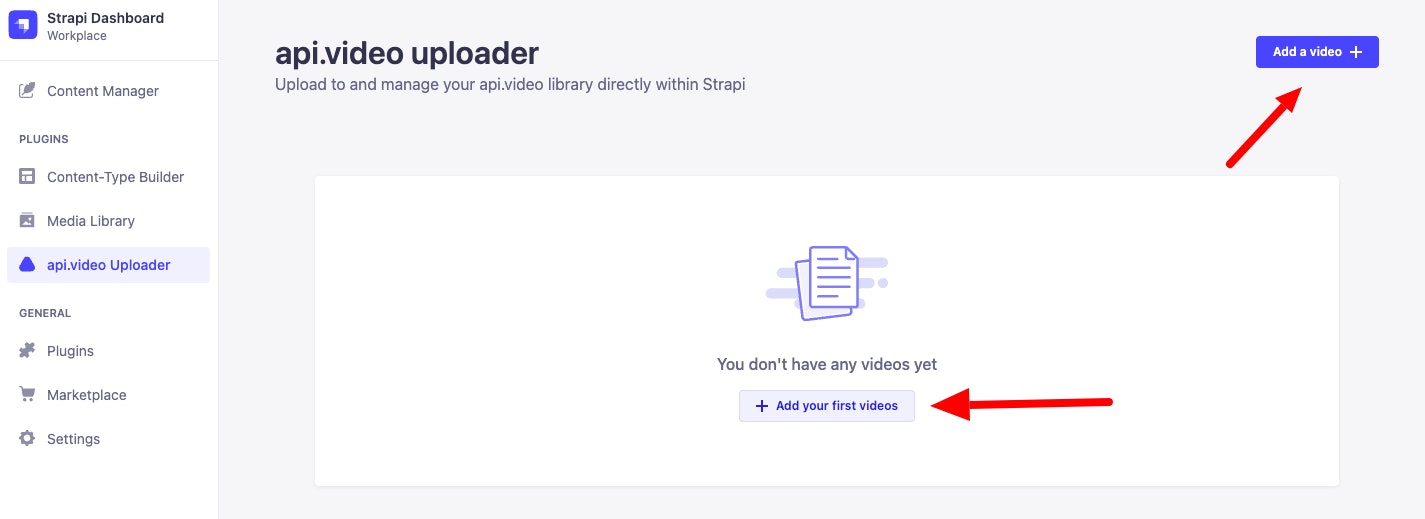
As you can see, you have two options to add a video. Click any of the buttons, and a pop-up window will appear.
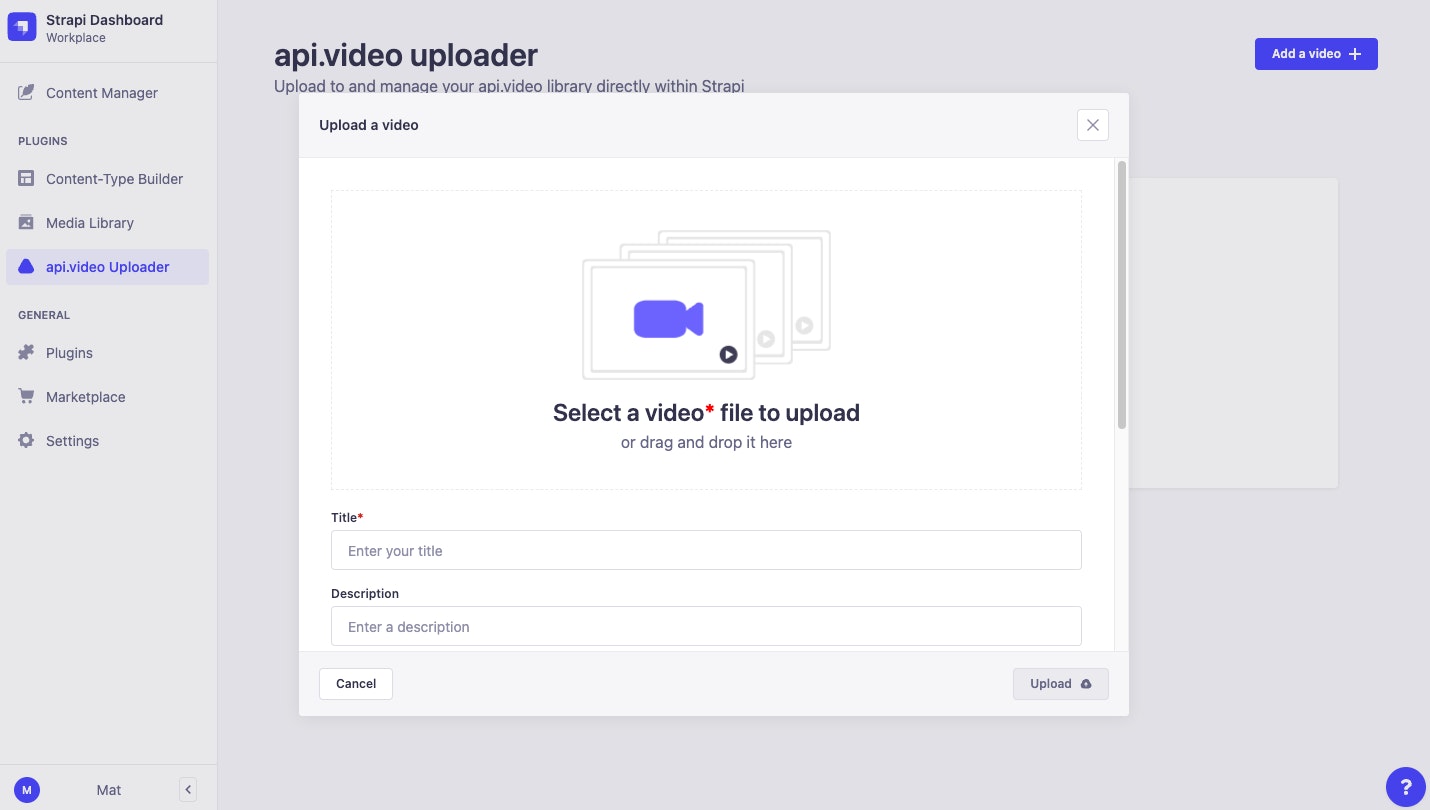
You can choose to upload your video file by either clicking on the Select a video box or drag and drop your video file into the boxed area. As you can see, the video must have a title. Once you select a video and enter a title, you can go ahead and click the Upload button. Wow! You have just uploaded your first video 🎈
Before clicking the Upload button, you can also add several video attributes that would help you or your business to organize and rank your videos in a more efficient way. You can write a description of the video, list a number of tags to categorize your video, and add metadata.
By default, the metadata sends the value Strapi as upload source and can’t be deleted. However, you can add as many other metadata as needed.
It’s worth mentioning that behind the scenes, it uses our home made typescript uploader for fast uploading.
Edit or delete your videos
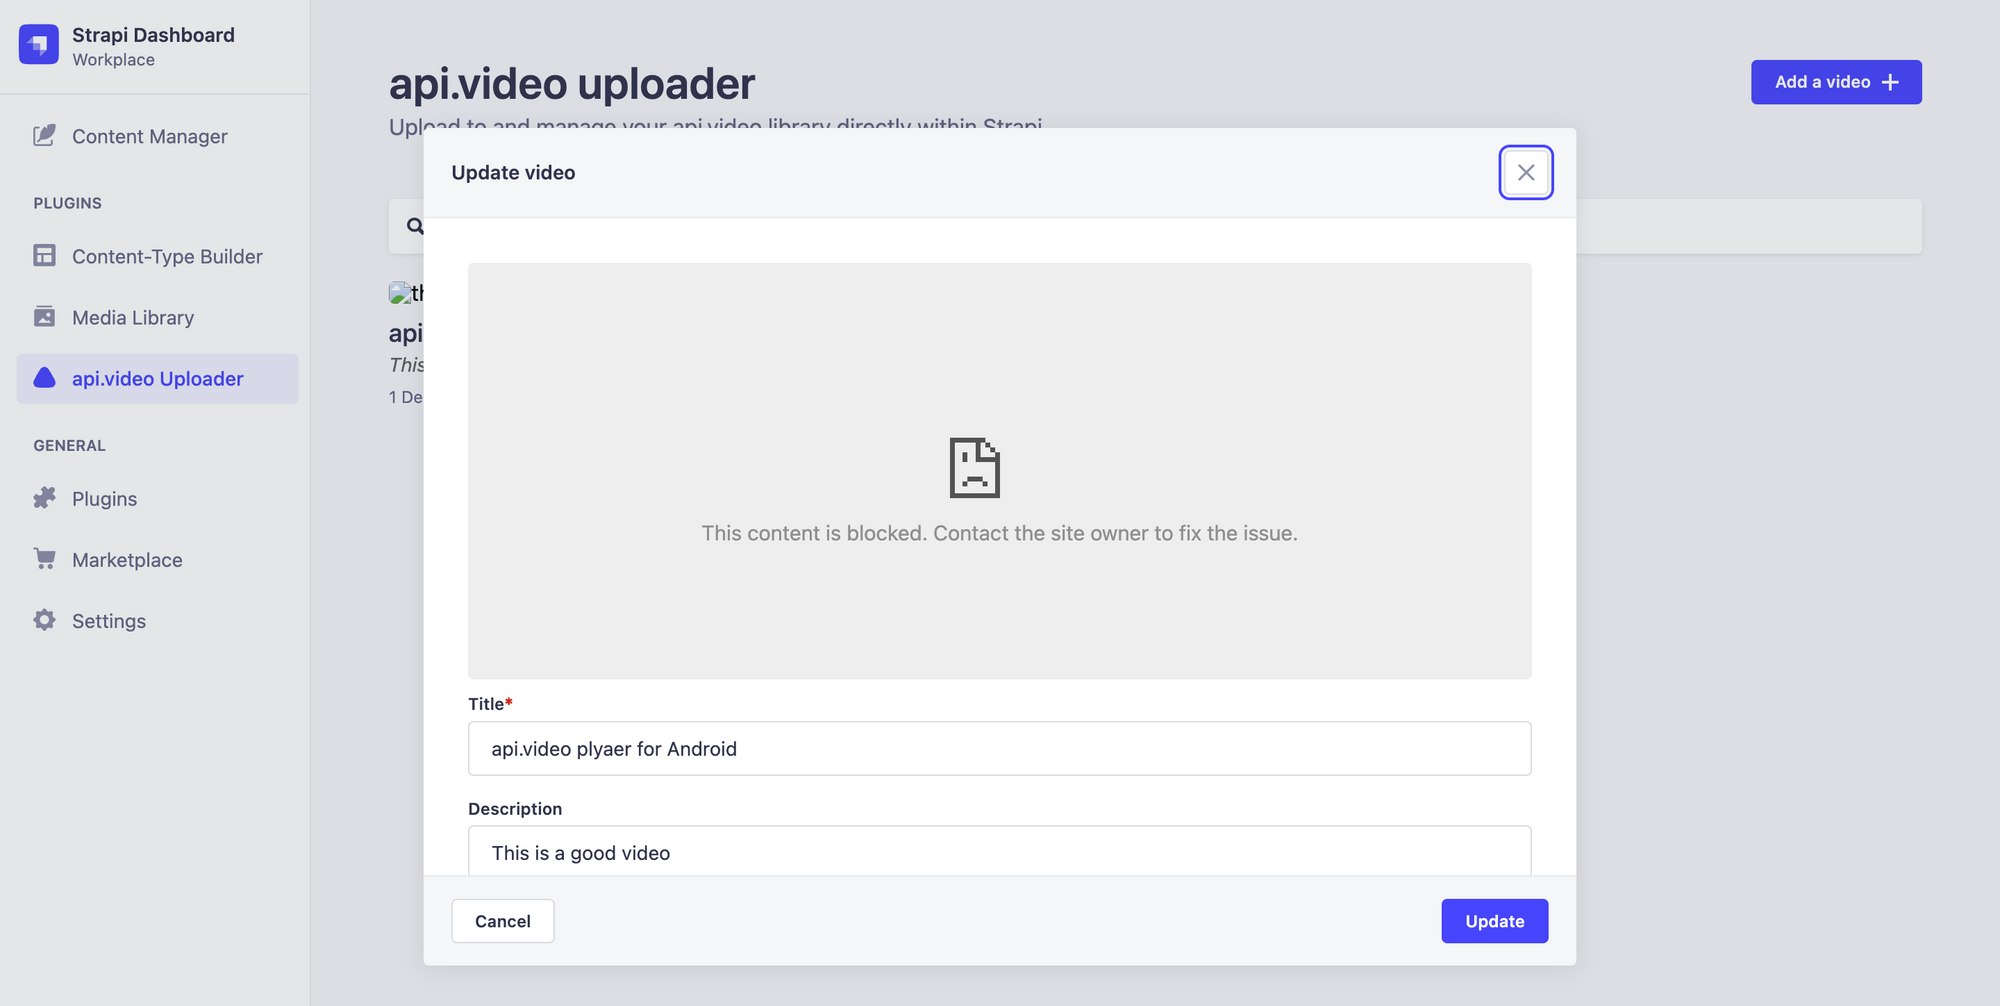
You can edit and update your videos at any time. The information modified will be applied and visible on the Strapi dashboard. The delete option is available on the thumbnail.
Configure the external resources**
If you encounter an issue in visualising the thumbnail and the video like the image above, please add those 2 external resources embed.api.video and cdn.api.video. Modify the middlewares.js file like below:
// config/middlewares.js
module.exports = ({ env }) => [
    'strapi::errors',
    {
        name: 'strapi::security',
        config: {
            contentSecurityPolicy: {
                useDefaults: true,
                directives: {
                    'connect-src': ["'self'", 'https:'],
                    'img-src': ["'self'", 'data:', 'blob:', 'embed.api.video', 'cdn.api.video/vod/'],
                    'frame-src': ["'self'", 'data:', 'blob:', 'embed.api.video'],
                    upgradeInsecureRequests: null,
                },
            },
        },
    },
    'strapi::cors',
    'strapi::poweredBy',
    'strapi::logger',
    'strapi::query',
    'strapi::body',
    'strapi::favicon',
    'strapi::public',
]
Permissions
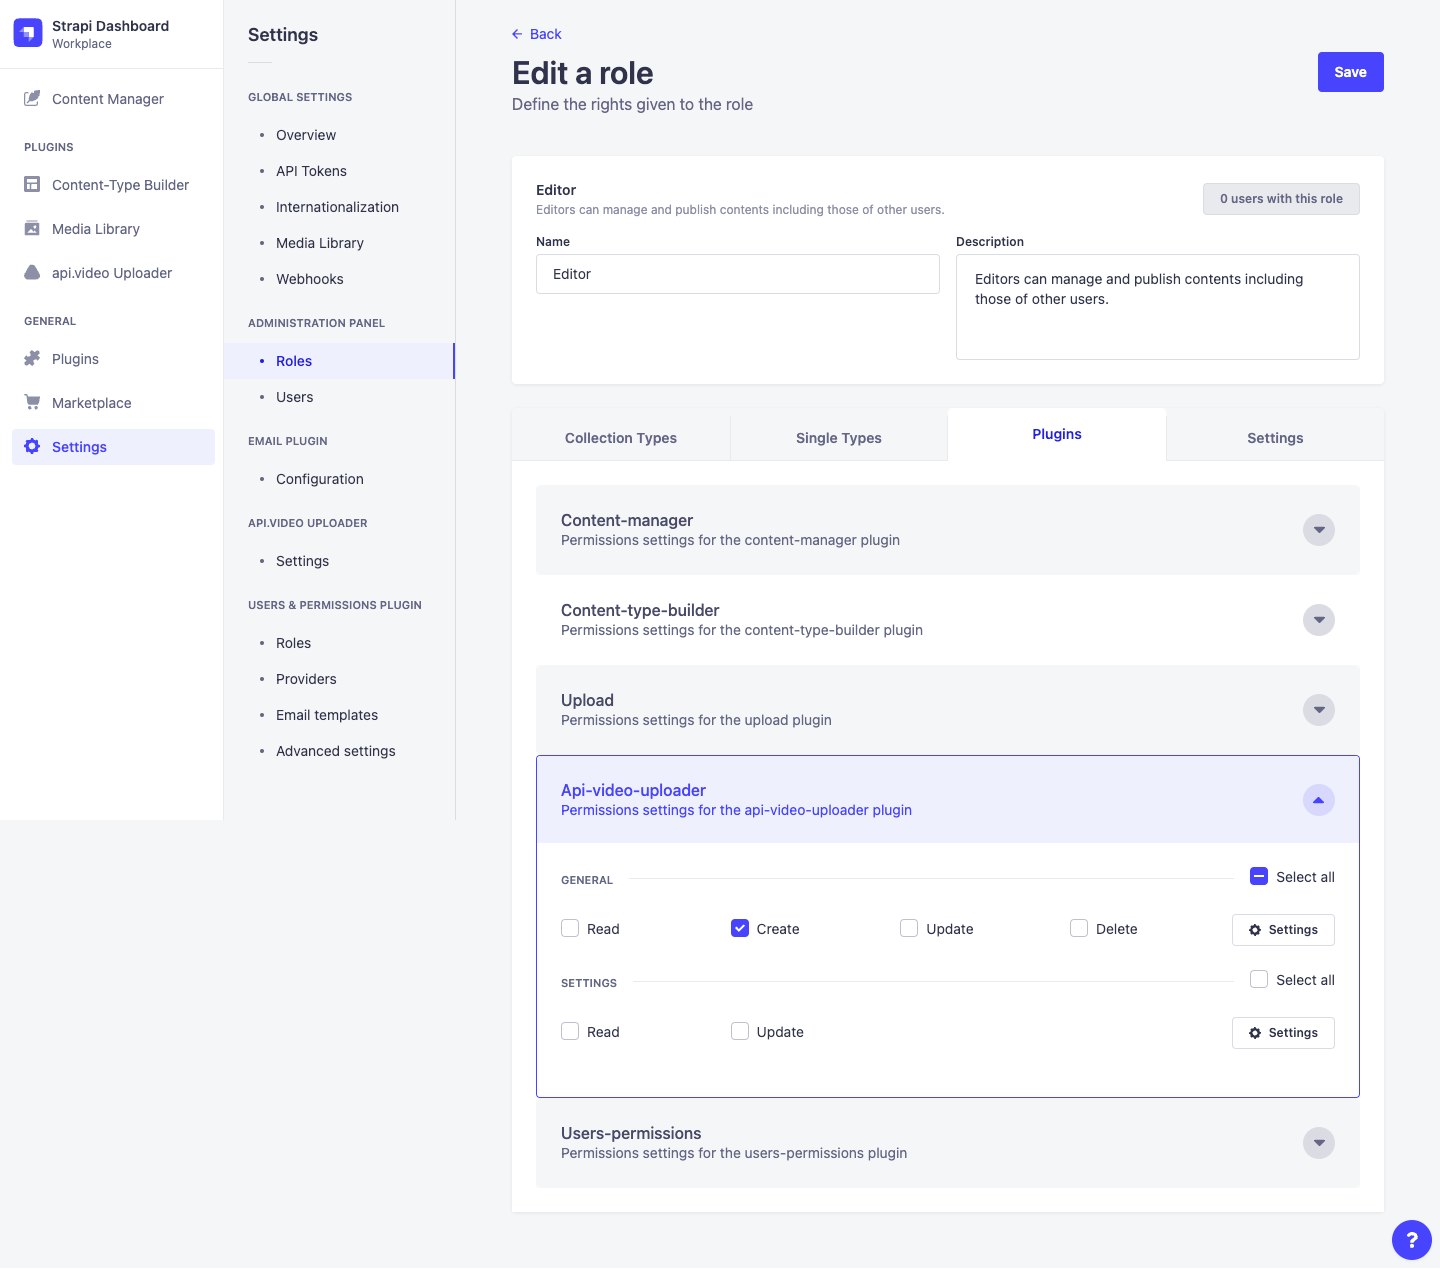
With the Community Edition of Strapi, any user with the role of super administrator can configure and use the plugin.
With Strapi Enterprise the permissions can be fine tuned according to the role of the users. This is done in the Roles view in the Administration Panel.
Integrate the api.video uploader with your application
The api-video-asset collection type gives users a way of easily integrate api.video assets in their front-end application thanks to custom api call.
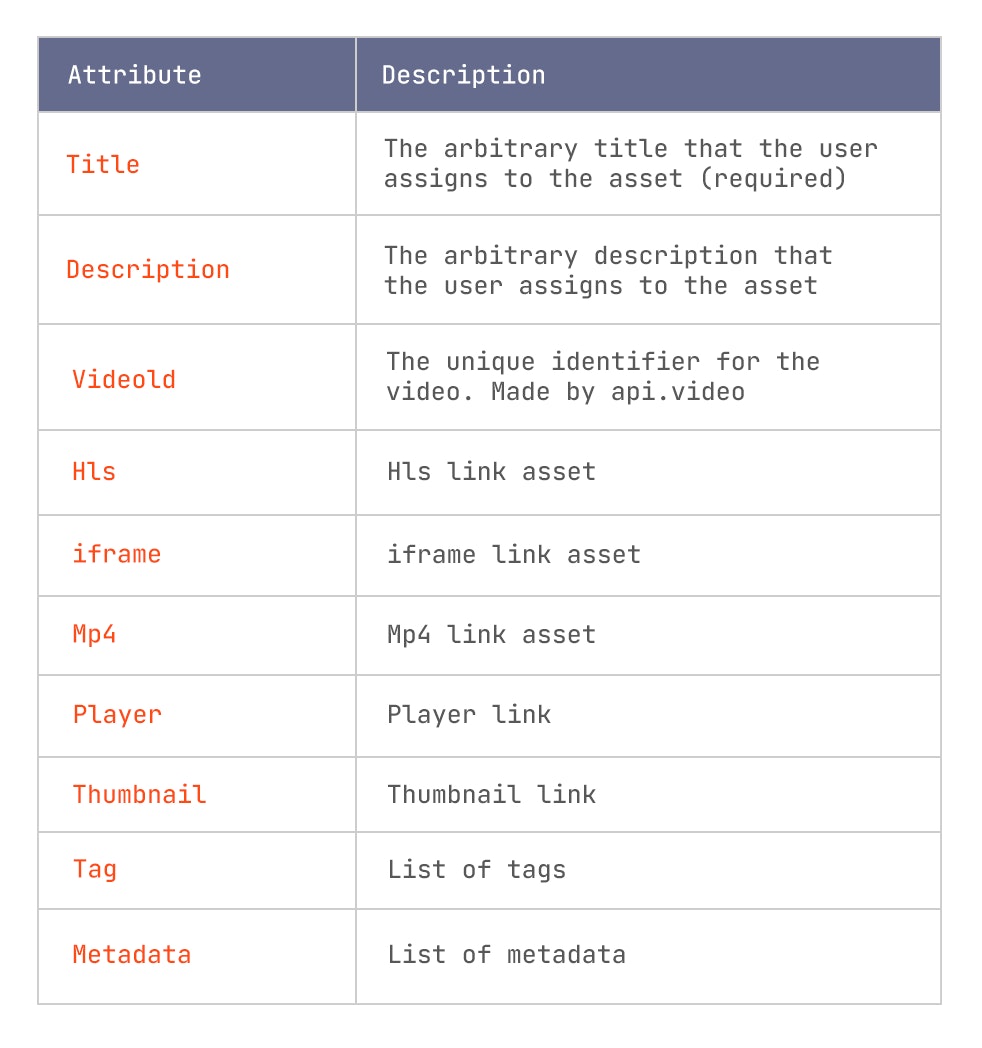
The info that is stored on the api-video-asset collection type is the following:
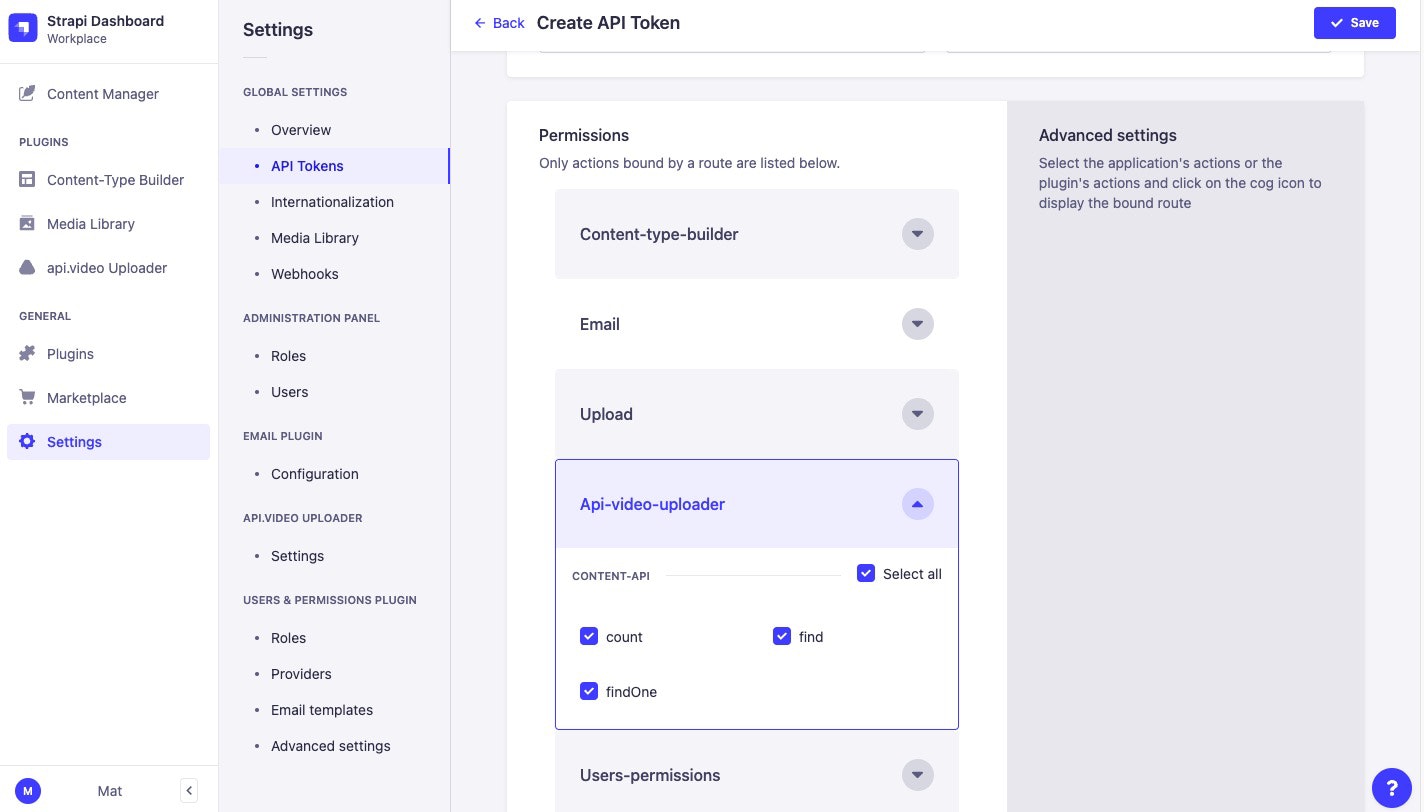
The endpoint is protected, so you need a token to authenticate. Go to the Settings section on your Strapi dashboard and then select API Tokens. Click on Create new API Token. Select Custom as your Token type and then scroll down to Api-video-uploader and choose what type of permission you want.
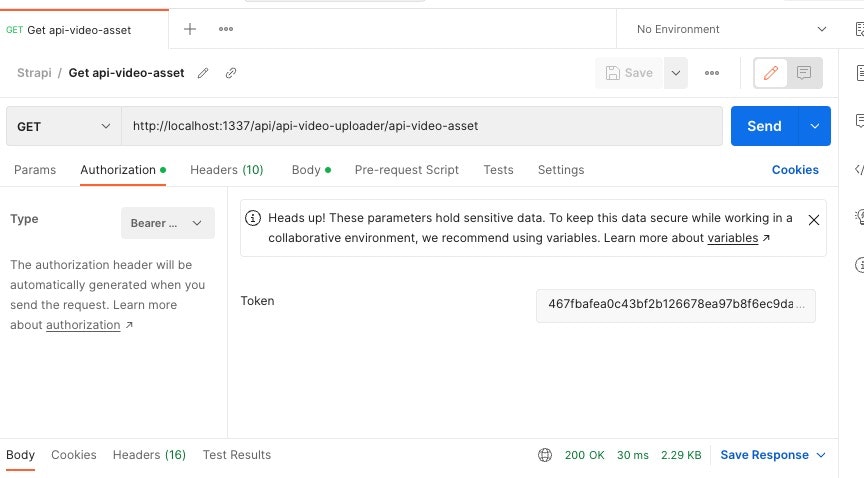
After clicking on the Save button, copy the bearer token published. We are going to test it on Postman. Copy the following URL address http://localhost:1337/api/api-video-uploader/api-video-asset and paste it next to your request type. Go to Authorization, select the Type Bearer and paste the copied token. Click send and you will get your videos details!
Final thoughts
We're super excited to see what folks will build with the api.video and Strapi 🤩
If you're looking for an easy way to integrate video into your application, check out our docs and sign up for a free account.
Follow our latest news by subscribing to our newsletter
Create your free account
Start building with video now

