How to build a live streaming app in 3 steps
March 31, 2022 - Yohann Martzolff in live - create, API client, iOS, JavaScript, React Native
In this tutorial, you will learn how to build our own live streaming broadcast application with React Native and api.video. We're also going to use TypeScript, but you can choose either TypeScript or JavaScript. Both work well with api.video's clients. For further details, check out our official repository.
Getting started
First, follow the development setup steps from React Native's official documentation.
If you're new to React Native, you may also need to learn the basics.
Make sure that you have the latest Node stable version installed.
Quick reminder: iOS development is only enabled for macOS users. If you're on Windows or Linux, you can develop for Android.
The official React Native documentation states, "you can follow the Expo CLI Quickstart to learn how to build your iOS app using Expo instead."
Create a new React Native app
Open a new terminal. Go to the folder of your choice and run the following command to create a new React Native application with TypeScript:
# With TypeScript
npx react-native init LiveStreamApp --template react-native-template-typescript
# Without TypeScript
npx react-native init LiveStreamApp
Launch the application
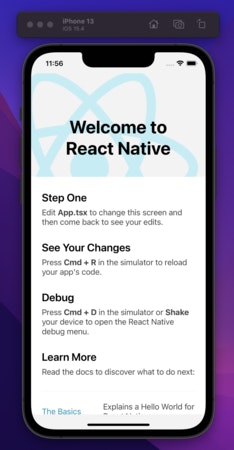
Inside your new project start Metro to bundle your application:
cd LiveStreamApp && npx react-native startOnce Metro is connected and ready, open another terminal. Go to your project folder, and launch your application.
# iOS
npx react-native run-ios
# Android
npx react-native run-android
This command line can take several minutes to finish, stay calm and grab a coffee ☕
Add the live stream client to your app
Congratulations! 🎉 You've just created a React Native application! Now, it's time to install the api.video RTMP live stream client into it to live stream directly from your mobile device for free.
Installation
At this time, the npx react-native init command creates a React Native application with yarn.
Yarn is a package manager, like NPM. Don't worry if you've not worked with it before; it's easy to use and similar to NPM.
To install the api.video RTMP live stream client, open a terminal. Go to your project folder and run this command:
yarn add @api.video/react-native-livestreamFor iOS usage, you will need to complete two more steps: 1. Install the native dependencies with Cocoapods:
cd ios && pod install- This project contains Swift code. If it's your first dependency with swift code, you’ll need to create an empty Swift file in your project (with the bridging header) from Xcode. You can find instructions here.
Permissions
⚠️ Both iOS and Android need permission to broadcast from your device's camera and record audio.
You will also need to ask for internet permission for Android.
Android
From your project folder, open the AndroidManifest.xml file. It’s located in the LiveStreamApp/android/app/src/main directory.
Add the following content just under the opening <manifest> tag to enable internet, audio recording, and the camera for your application:
<uses-permission android:name="android.permission.INTERNET" />
<uses-permission android:name="android.permission.RECORD_AUDIO" />
<uses-permission android:name="android.permission.CAMERA" />
iOS
From your project folder, open the Info.plist file. It’s located in the LiveStreamApp/ios/LiveStreamApp directory.
Add the following content just under the opening <dict> tag to enable the camera and microphone:
<key>NSCameraUsageDescription</key>
<string>Your description of the application</string>
<key>NSMicrophoneUsageDescription</key>
<string>Your description of the application</string>
Don't forget to add the app description, as shown above, if you want to deploy your application in stores.
Sign your iOS application (optional)
You may need to sign your iOS application. I recommend doing it now to avoid issues later.
Usage
Component
Change your App.tsx file with the following code:
import {LivestreamView} from '@api.video/react-native-livestream';
import React, {useRef, useState} from 'react';
import {View, TouchableOpacity, StyleSheet} from 'react-native';
import {
  LiveStreamView,
  LiveStreamMethods,
} from '@api.video/react-native-livestream';

const App = () => {
  const ref = useRef<LiveStreamMethods>(null);
  const [streaming, setStreaming] = useState<boolean>(false);
  const styles = appStyles(streaming);

  const handleStream = (): void => {
    if (streaming) {
      ref.current?.stopStreaming();
      setStreaming(false);
    } else {
      ref.current?.startStreaming('YOUR_STREAM_KEY');
      setStreaming(true);
    }
  };

  return (
    <View style={styles.appContainer}>
      <LiveStreamView
        style={styles.livestreamView}
        ref={ref}
        camera="back"
        video={{
          fps: 30,
          resolution: '720p',
          bitrate: 2 * 1024 * 1024, // # 2 Mbps
        }}
        audio={{
          bitrate: 128000,
          sampleRate: 44100,
          isStereo: true,
        }}
        isMuted={false}
        onConnectionSuccess={() => {
          //do what you want
          console.log('CONNECTED');
        }}
        onConnectionFailed={e => {
          //do what you want
          console.log('ERROR', e);
        }}
        onDisconnect={() => {
          //do what you want
          console.log('DISCONNECTED');
        }}
      />

      <View style={buttonContainer({bottom: 40}).container}>
        <TouchableOpacity
          style={styles.streamingButton}
          onPress={handleStream}
        />
      </View>
    </View>
  );
};

export default App;

const appStyles = (streaming: boolean) =>
  StyleSheet.create({
    appContainer: {
      flex: 1,
      alignItems: 'center',
    },
    livestreamView: {
      flex: 1,
      alignSelf: 'stretch',
    },
    streamingButton: {
      borderRadius: 50,
      backgroundColor: streaming ? 'red' : 'white',
      width: 50,
      height: 50,
    },
  });

interface IButtonContainerParams {
  top?: number;
  bottom?: number;
  left?: number;
  right?: number;
}
const buttonContainer = (params: IButtonContainerParams) =>
  StyleSheet.create({
    container: {
      position: 'absolute',
      top: params.top,
      bottom: params.bottom,
      left: params.left,
      right: params.right,
    },
  });
⚠️ You may need to relaunch your Metro after this.
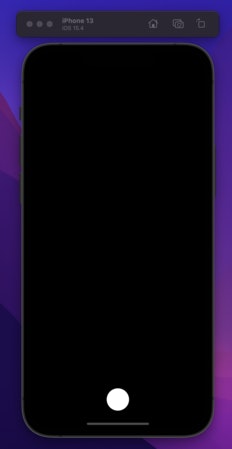
A black screen with a round button at the bottom should appear in your emulator: it's your live stream view.
Launch your first live stream
If you want to test to live stream from an actual device (iOS in our case), open Xcode. Click on “Open a project or file,” select the LiveStreamApp/ios folder, and open it.
Connect your device to your iMac/Macbook and run your application.
For Android, you can check the official documentation.
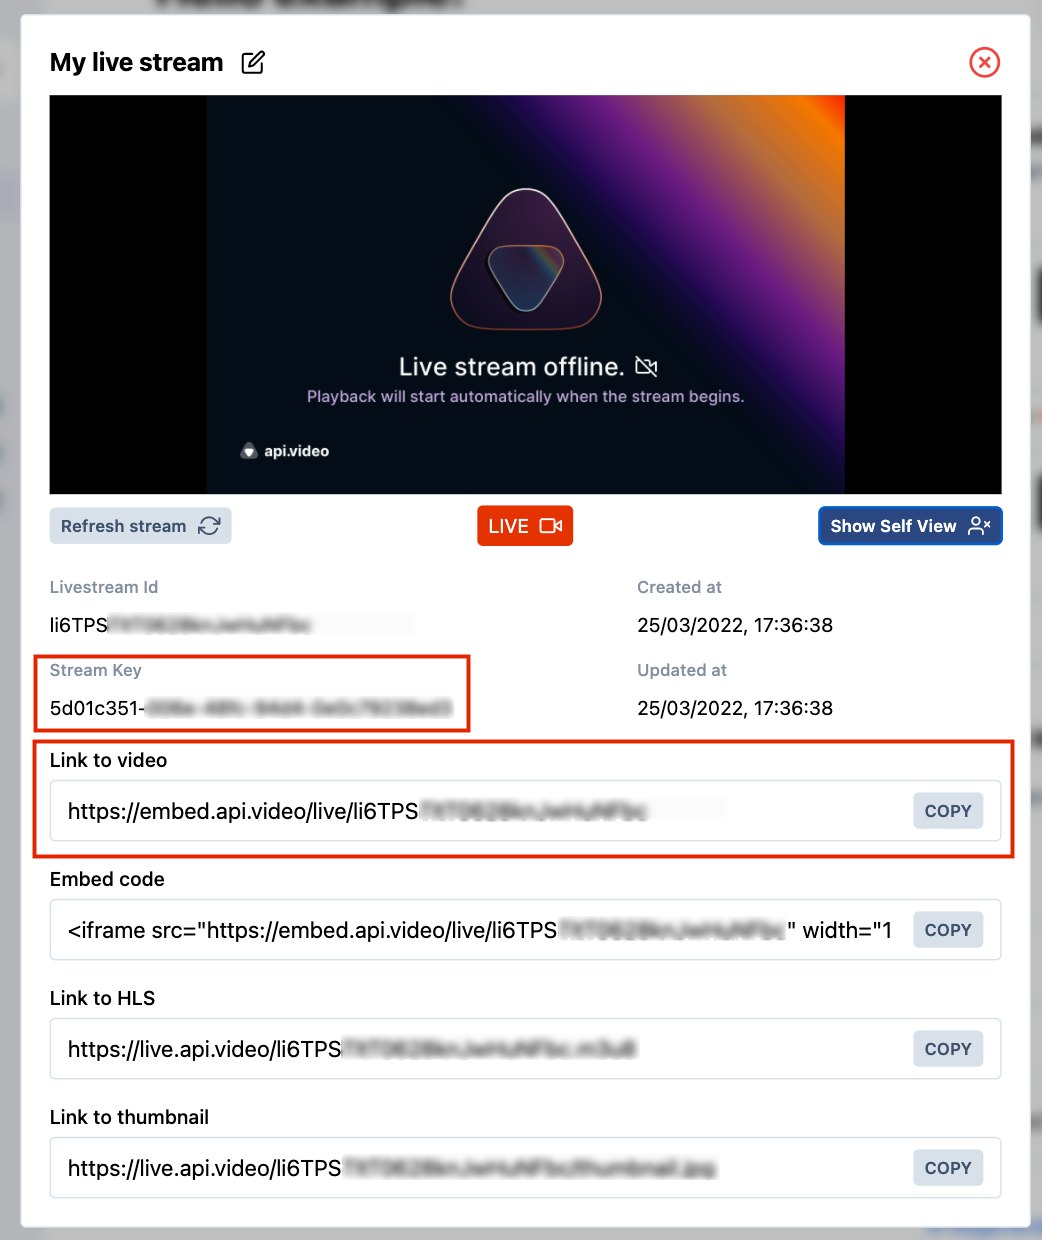
You will need to change YOUR_STREAM_KEY to a real one. You can find yours in the api.video dashboard. If you don't have an account yet, create one, it's free.
Then, create a livestream from the overview or the “Live streams” page.
A modal will appear with several pieces of information in it, including the shareable link and stream key. Save the shareable link to access your live stream later.
💡 You can also use the api.video API to create a live stream and retrieve your stream key dynamically. Find how to do this right here.
Paste your stream key in place of YOUR_STREAM_KEY.
Click on the button in your application; it should turn red. Them, go to the shareable link you just saved. There you go! You can see what your mobile is streaming in real-time! If it's not the case, wait a few seconds and check your stream key value.
Make it dynamic
Our application is working; we can now do an actual live stream directly from our smartphone. But api.video RTMP live stream client allows us to customize our live stream the way we want. In this section, we will see how to customize our live stream parameters and make our application UI better.
Check the official README for exhaustive information about the @api.video/react-native-livestream package.
Some properties can be updated during the live stream:
- Camera: front or back
- Audio: muted or not
We can leave these properties on the live stream view. This way, we can update them during our live stream.
Add icons
We will need icons in our application. Install the corresponding dependency before going further.
- Stop your application
- Delete the pods (only for iOS usage.)
cd ios && pod deintegrate
rm -rf Podfile.lock
pod install- Add the react-native-vector-icons NPM package:
cd ../ && yarn add react-native-vector-icons- Go into
/iosand install your pods (only for iOS usage.)
cd ios/ && pod install- To display an icon, import it and use it as a component
import Icon from 'react-native-vector-icons/Ionicons';⚠️ An import error could be displayed in Visual Studio Code, but it should work anyway.
Live stream view
Right now, we only have a single button at the bottom of our live stream view, contained in the App.tsx file.
<View style={buttonContainer({bottom: 40}).container}>
  <TouchableOpacity
    style={styles.streamingButton}
    onPress={handleStream}
  />
</View>
We can customize this component a little bit to make it more obvious.
Streaming button
Let's add text if our live stream is not running and an icon when it is. Replace the above code by this one:
<View style={buttonContainer({bottom: 40}).container}>
  <TouchableOpacity style={styles.streamingButton} onPress={handleStream}>
    {streaming ? (
      <Icon name="stop-circle-outline" size={50} color="red" />
    ) : (
      <Text>Start live stream</Text>
    )}
  </TouchableOpacity>
</View>
Don't forget to update your style to display the streaming button conditionally:
const appStyles = (streaming: boolean) =>
  StyleSheet.create({
    appContainer: {
      flex: 1,
      alignItems: 'center',
    },
    livestreamView: {
      flex: 1,
      alignSelf: 'stretch',
    },
    streamingButton: {
      display: 'flex',
      alignItems: 'center',
      justifyContent: 'center',
      borderRadius: !streaming ? 50 : undefined,
      backgroundColor: !streaming ? 'white' : undefined,
      paddingHorizontal: !streaming ? 20 : undefined,
      paddingVertical: !streaming ? 10 : undefined,
    },
  });
Camera button
To change the camera input (front or back), we need to add a button we can access during our live stream.
To do this, a local state is needed, like the streaming one:
- Add it in your
Appcomponent and replace your static string for the camera props:
const [camera, setCamera] = useState<'front' | 'back'>('back');

// In the <LiveStreamView /> component
camera={camera}- Handle the change of camera with this handler. Place it in your
Appcomponent:
const handleCamera = (): void => setCamera(_prev => (_prev === 'back' ? 'front' : 'back'));- Add this code under your streaming button. It’s our camera icon component:
<View style={buttonContainer({bottom: 45, right: 40}).container}>
  <TouchableOpacity onPress={handleCamera}>
    <Icon name="camera-reverse-outline" size={30} color="white" />
  </TouchableOpacity>
</View>
When you press the camera icon, displayed in the bottom right corner, you should switch from the back camera to the front and vice versa.
Muted button
We may want to mute our stream at a specific time. For this, we also need a local state and a button.
- Add a new local state under the other ones and replace your static boolean for the
isMutedprops:
const [muted, setMuted] = useState<boolean>(false);

// In the <LiveStreamView /> component
isMuted={muted}- Handle the change of
mutedstate with this handler. Place it in yourAppcomponent:
const handleMuted = (): void => setMuted(_prev => !_prev);- Add this code under your camera button. It’s our mute icon component:
<View style={buttonContainer({bottom: 45, left: 40}).container}>
  <TouchableOpacity onPress={handleMuted}>
    <Icon
      name={muted ? 'mic-off-outline' : 'mic-outline'}
      size={30}
      color={muted ? 'red' : 'white'}
    />
  </TouchableOpacity>
</View>
When you press the mute icon, displayed in the bottom left corner, you should switch from muted to unmuted.
And voilà! You can now launch a live stream directly from your device, choose which camera you want to use, and allow sound recording or not.
And now what?
Congratulations! You just created a fully functional live streaming broadcast application. You can go further and implement the logic to modify all other settings provided by api.video. You can check the React Native live streaming sample application to get an idea of the potential of this tool (product?).
api.video provides two development environments. The sandbox allows you to live stream directly from your computer or mobile, but a watermark will be applied to your video and there is a 30 minute limit for live streams.
To avoid these limitations, try one of the plans found here and go into production mode 🚀
Follow our latest news by subscribing to our newsletter
Create your free account
Start building with video now


