Build your own TikTok with PWA and api.video
July 7, 2022 - Mathieu Thiry in Player SDK, video create, Video list, Video upload, Player, Mobile, React, Typescript, Next.js
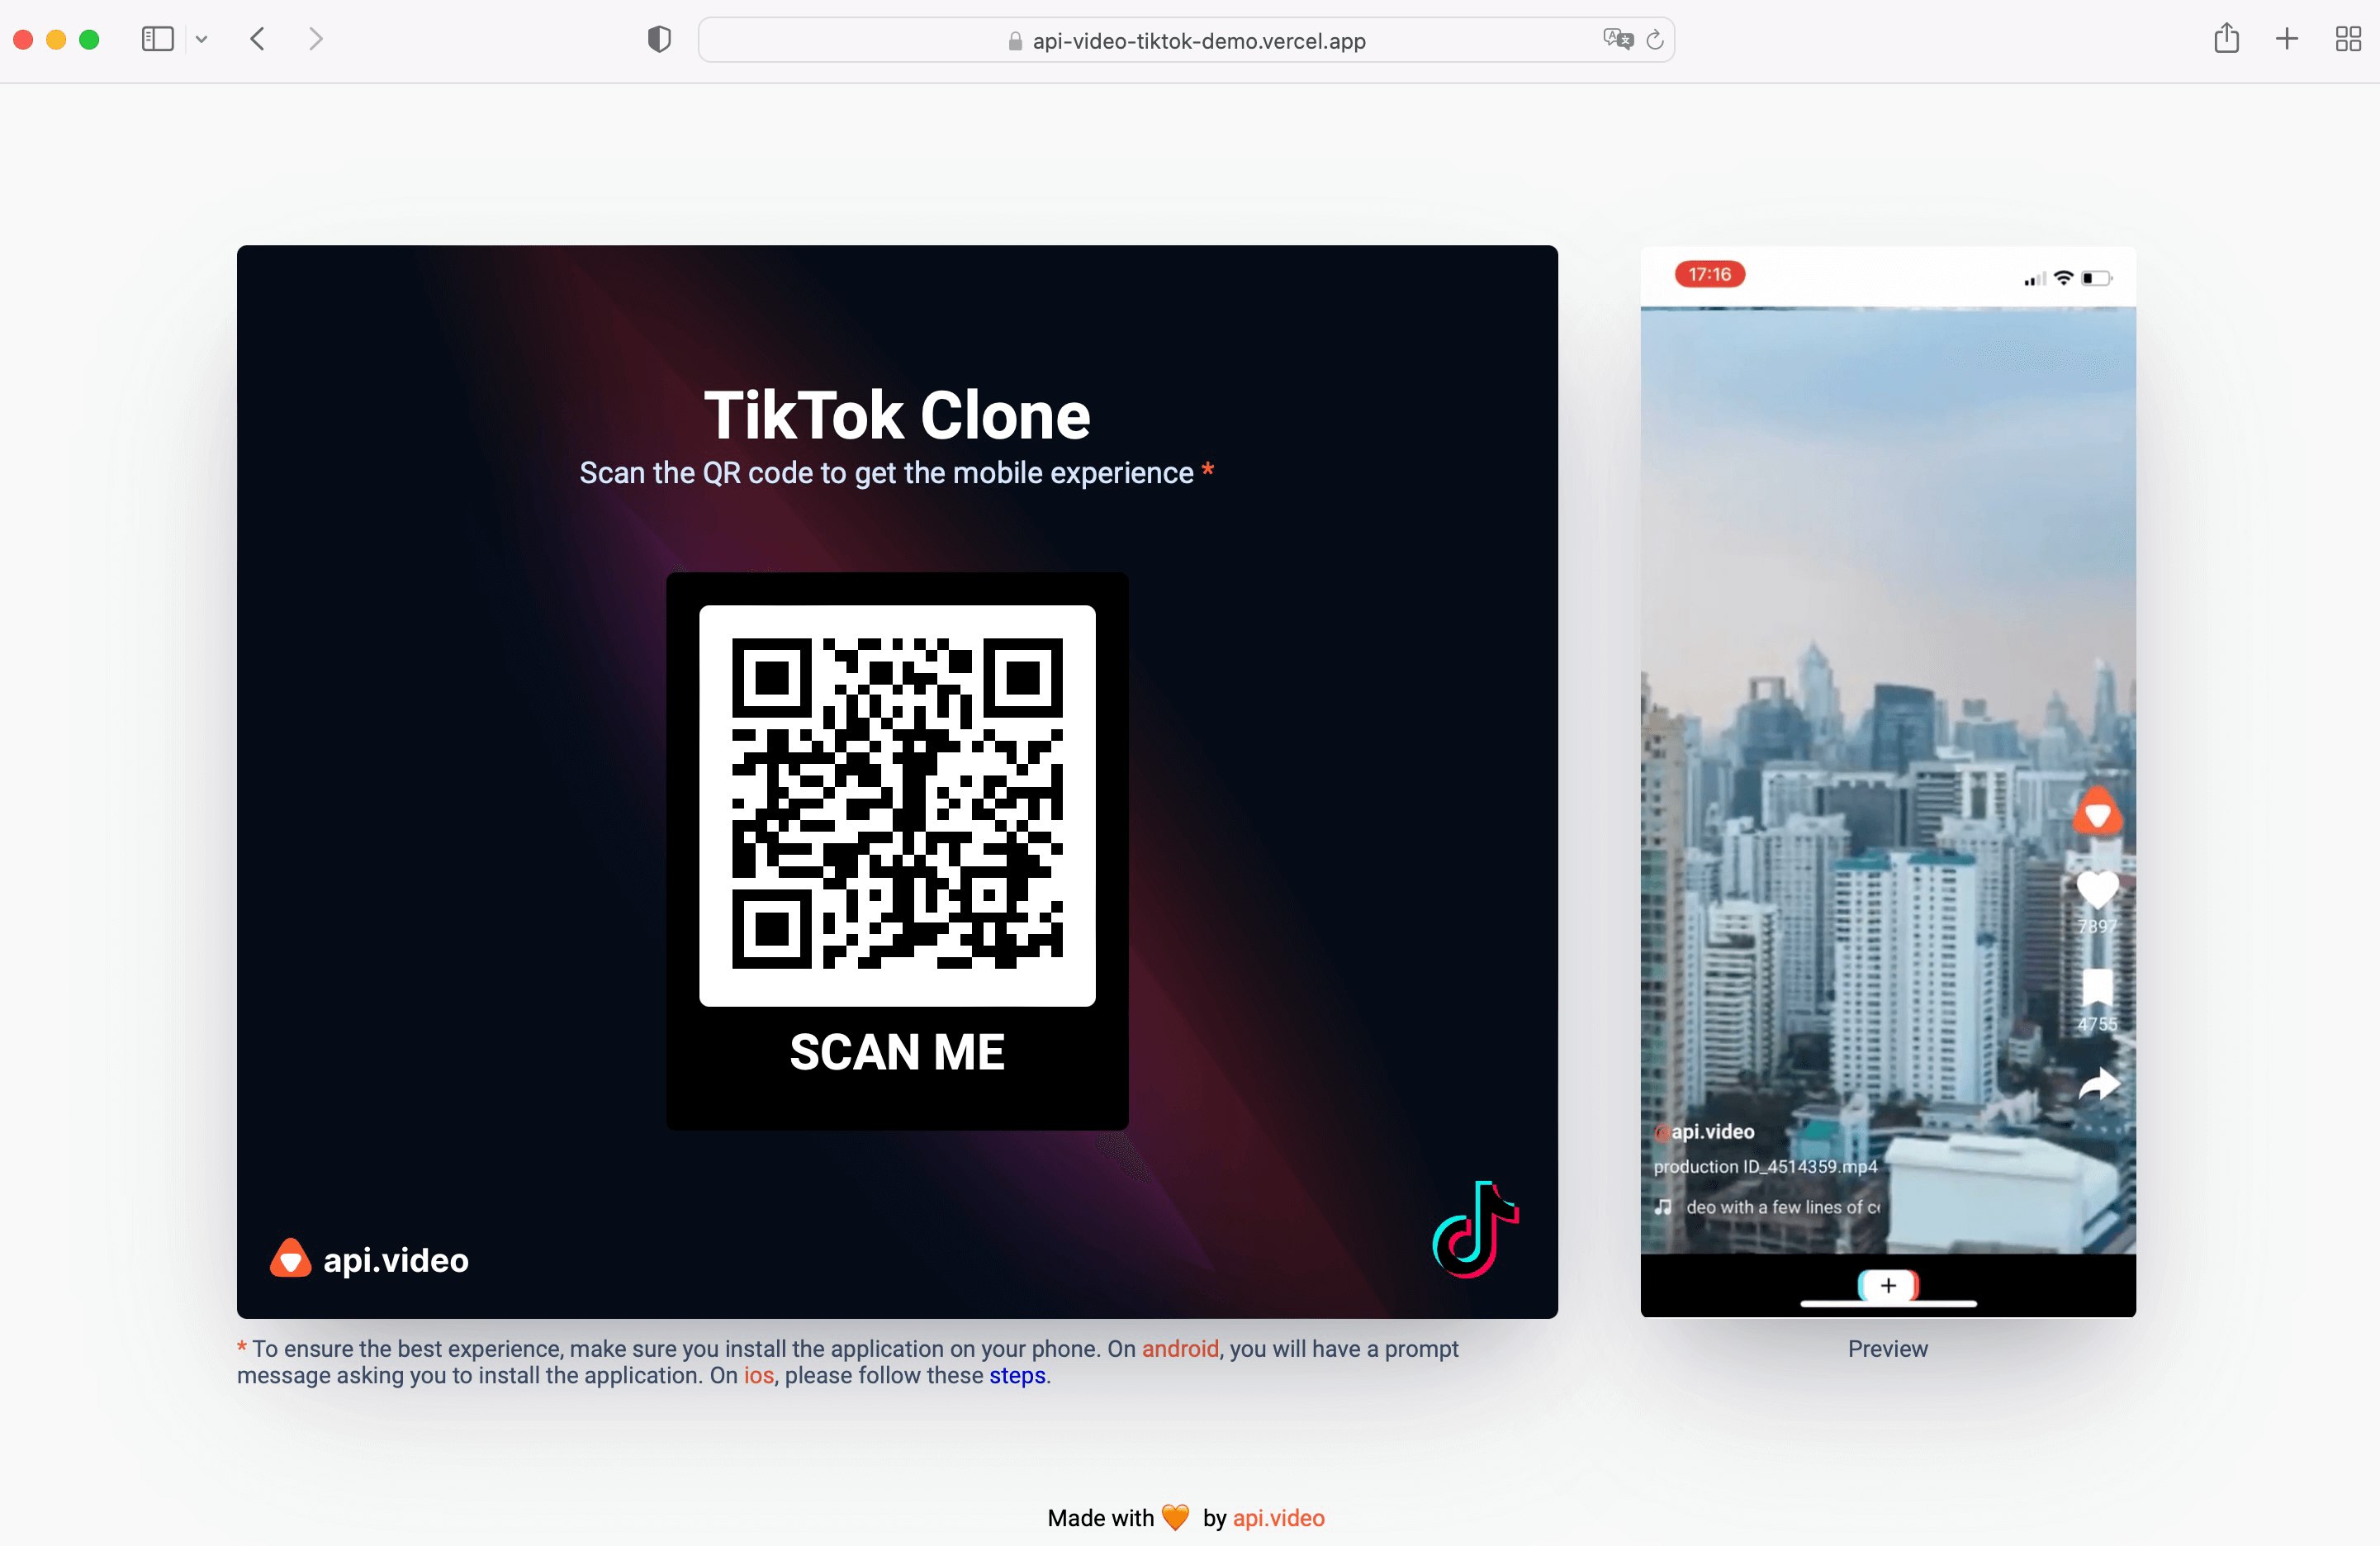
This tutorial will show how quick and straightforward it is to build a TikTok clone as a progressive web app (PWA) with api.video and Next.js. A PWA is a website that looks and behaves like a mobile app. It can have all the capabilities of a native mobile app, like design and functionality, and you can even install it on your phone!
TikTok’s core functionality is to create and share short-form content. So today, we will focus on these crucial features:
- Get videos with @api.video-node.js-client package
- Display videos with @api.video/react-player package
- Upload videos with @api.video-typescript-uploader package
Thanks to these 3 easy-to-use api.video tools, you will have everything you need to build a smooth scrolling TikTok feed. Let's start 🎬
NB: You can see the demo here and the complete code here. We invite you to clone the project, insert your free-to-use API key from our Sandbox environment and start testing it with your videos!
Quick Setup
As in this tutorial, we will focus on the core features. We provide two links on how to start the project easily:
We created a dedicated tutorial on building a new Next.js application using Create Next App and Typescript. Please follow these instructions to get an up-to-date Next.js app.
- Once inside our project, install api.video’s Node.js client, typescript video uploader, react’s player SDK, and swr for data fetching.
npm i --save @api.video/nodejs-client @api.video/video-uploader
@api.video/react-player swr
Get videos
Back-end: Create API routes with api.video/nodejs-client
You can declare the API under the pages/api directory. When you declare a file or folder inside pages/api, it will generate an URL endpoint that matches /api/<folder>/<file>. We set our API key in an environment variable in the .env.local file for security.
Now create a pages/api/videos/index.ts file. Inside this file, add the following code:
// src/pages/api/videos/index.ts

import ApiVideoClient from '@api.video/nodejs-client'
import { NextApiRequest, NextApiResponse } from 'next'

const handler = async (req: NextApiRequest, res: NextApiResponse) => {
    const defaultApiKey = process.env.API_KEY

    const { videoId, metadata } = req.body
    const { method } = req.query
    const client = new ApiVideoClient({
        apiKey: defaultApiKey,
    })

    if (method == 'get') {
        const result = await client.videos.list({})
        return res.status(200).json({ ...result })
    }

    // UPDATE DATA
    if (method === 'patch') {
        const videoUpdatePayload = {
            metadata, // A list (array) of dictionaries where each dictionary contains a key value pair that describes the video. As with tags, you must send the complete list of metadata you want as whatever you send here will overwrite the existing metadata for the video.
        }

        const result = await client.videos.update(videoId, videoUpdatePayload)
        res.status(204).send(result)
        return
    }
}
export default handler
We can get videos in just a few lines of code by applying the method list. Check more methods you can use with our nodejs client here.
Front-end: Client-side data fetching
Initialize swr
useSWR is a React Hook library made by Vercel. It fetches data from an API or other external source, then saves that data in a cache and renders the data. We configure swr in _app.tsx.
// src/pages/_app.tsx

import type { AppProps } from 'next/app'
import { SWRConfig } from 'swr'

const fetcher = async (input: RequestInfo, init: RequestInit, ...args: any[]) => {
    const res = await fetch(input, init)
    return res.json()
}

function MyApp({ Component, pageProps }: AppProps) {
    return (
        <SWRConfig value={{ fetcher }}>
            <Component {...pageProps} />
        </SWRConfig>
    )
}

export default MyApp
The useSWR hook takes two parameters and returns data. It accepts the following:
- A
Key: API URL we are calling. - A
fetcher: a function that returns the fetched data.
// src/pages/index.tsx

import Video from '@api.video/nodejs-client/lib/model/Video'
import VideosListResponse from '@api.video/nodejs-client/lib/model/VideosListResponse'
import type { NextPage } from 'next'
import { useEffect, useState } from 'react'
import useSWR from 'swr'
import Upload from '../components/upload'
import VideoComponent from '../components/video/index'
import styles from './index.module.css'

const Home: NextPage = () => {
    const [videos, setVideos] = useState<Video[]>([])
    const { data, mutate } = useSWR<VideosListResponse>('api/videos?method=get')

    useEffect(() => {
        data && setVideos(data.data.reverse())
    }, [data])

    return (
        <div className={styles.app}>
            <div className={styles.app__videos}>
                {videos.map((video: Video, index) => {
                    return <VideoComponent key={video?.assets?.thumbnail} video={video} index={index} mutate={mutate} />
                })}
            </div>
            <Upload mutate={mutate} />
        </div>
    )
}

export default Home
We call useSWR hook. Once we get the result, we store data in the state videos. Then, we map videos around VideoComponent, whose role is to display videos.
How to create smooth scrolling
The app has a height: 100vh. It has 2 sections. The first one, the div app__video, is scrollable with a height: calc(100%-50px), and the second one, the upload section, has a fixed height: 50px.
/* src/pages/index.module.css */

.app {
    height: 100vh;
    width: 100vw;
}

.app__videos {
    height: calc(100% - 50px);
    width: 100%;
    scroll-snap-type: y mandatory;
    overflow-y: scroll;
}

@media screen and (min-width: 1024px) {
    .app__videos {
        display: none;
    }
}

/* upload.module.css */

.upload {
    height: 50px;
    width: 100%;
    ...
}
CSS scroll snap
As written above, the class app__videos has the property scroll-snap-type: y mandatory; and overflow-y: scroll; making the scroll vertical. This property allows for the creation of well-controlled scroll experiences by declaring a scroll snapping position, in our case, at the start of the video. To obtain this perfect result, we just need to add the property scroll-snap-align: start to the child component, here the ApiVideoPlayer (see code in the section below.)
Display videos
We are going to use api.video react player component, which allows us to display our videos in just a few lines of code. The only requirement is to pass the videoId. Create a ref to manipulate methods like pause or play easily. We set the object-fit CSS property in cover to ensure that even a landscape video will take the full size.
// src/components/video/index.tsx

import Video from '@api.video/nodejs-client/lib/model/Video'
import React, { FC, useRef, useState } from 'react'
import styles from './videos.module.css'
import ApiVideoPlayer from '@api.video/react-player'

export interface IvideosProps {
    video: Video
    mutate: () => void
}

const VideoComponent: FC<IvideosProps> = ({ video, mutate }): JSX.Element => {
    const [playing, setPlaying] = useState<boolean>(true)

    const { videoId } = video

    const videoRef = useRef<ApiVideoPlayer>(null)

    const onVideoPress = () => {
        if (playing) {
            pause()
        } else {
            play()
        }
    }

    const pause = () => {
        videoRef.current?.pause()
        setPlaying(false)
    }
    const play = () => {
        videoRef.current?.play()
        setPlaying(true)
    }

    const height = window.screen.availHeight - 50

    return (
        <>
            {video && (
                <div className={styles.video} id={videoId}>
                    <ApiVideoPlayer
                        video={{ id: videoId }}
                        videoStyleObjectFit={'cover'} // The object-fit CSS
                        ref={videoRef}
                        style={{
                            width: screen.width,
                            height: height,
                            scrollSnapAlign: 'start', // property to adjust position
                            border: 0,
                        }}
                        autoplay
                        chromeless  // Chromeless mode: all controls are hidden
                        loop
                        muted
                    />
                    <div onClick={onVideoPress} className={styles.video__press}></div>
                </div>
            )}
        </>
    )
}

export default VideoComponent
Upload a video
api.video provides a typescript library to upload videos to api.video using delegated upload token. The easiest way to create an upload token is to open your api.video’s dashboard, go to the upload tokens section from the sidebar, then click on the “Create upload token” button. Find the full guide here.
// src/components/upload/index.tsx

import React, { FC, useRef } from 'react'
import { VideoUploader, VideoUploadResponse } from '@api.video/video-uploader'

const Upload: FC = (): JSX.Element => {

    // CONSTANTS
    const inputFile = useRef<HTMLInputElement | null>(null)
    // HANDLERS
    const openFilePicker = () => {
        inputFile && inputFile?.current?.click()
    }

    const fileInputChange = async (e: React.ChangeEvent<HTMLInputElement>) => {
        const { files } = e.target
        if (files?.length) {
            const uploadToken = process.env.NEXT_PUBLIC_UPLOAD_TOKEN as string
            const uploader = new VideoUploader({
                file: files[0],
                uploadToken,
            })
            try {
                await uploader.upload()
            } catch (e) {
                console.warn(e)
            }
        }
    }

    return (
        <div onClick={openFilePicker}>
						<p>upload</p>
	        <input
	          type="file"
            id="upload"
            ref={inputFile}
            name="upload"
            onChange={(e) => fileInputChange(e)}
            style={{ display: 'none' }}
           />
        </div>
    )
}

export default Upload
Upload using delegated upload token
We create a hidden input with a type file that we activate programmatically. Create a new object VideoUploader, and add two options, the upload token set as an environment variable for security purposes and the current file to upload.
That’s it. You are done 🎉. Now you can safely and efficiently upload videos.
Conclusion
We recreated TikTok thanks to api.video’s features in just a few steps. We did not cover every topic, but the entire code is available here.
And we're done! To start building right now, check out our docs and sign up for a free account.
BONUS
In this part, I will explain how to send 💟’s
Each video object has a metadata property containing an array of key-value objects. So we can add a ‘likes’ metadata with a numeric value and increase this value when the user has pressed on the 🤍 icon!
// src/components/sidebar/index.tsx

import { MdFavorite } from 'react-icons/md'
import styles from './sidebar.module.css'
import { FC, useState } from 'react'
import Video from '@api.video/nodejs-client/lib/model/Video'
import 'animate.css'
import Metadata from '@api.video/nodejs-client/lib/model/Metadata'

export interface ISidebarProps {
    video: Video
    mutate: () => void
}

const Sidebar: FC<ISidebarProps> = ({ video, mutate }): JSX.Element => {
    const [likes, setLikes] = useState(0)
    const [clickedLikes, setClickedLikes] = useState(false)
    const { videoId } = video

    const updateVideos = async (metadata: Array<Metadata>) => {
        await fetch(`/api/videos?method=patch`, {
            method: 'Post',
            headers: { 'Content-Type': 'application/json' },
            body: JSON.stringify({ videoId, metadata }),
        })
    }

    const onPressItem = async (metadata: Array<Metadata>, icon: string) => {
        icon === 'MdFavorite' && setClickedLikes(true)
        await updateVideos(metadata)
        mutate()
    }

    return (
        <div className={styles.sidebar}>
            <div
                className={styles.sidebar__button}
                onClick={() =>
                    !clickedLikes &&
                    onPressItem(
                        [
                            { key: 'likes', value: `${likes + 1}` },
                        ],
                        'MdFavorite'
                    )
                }
            >
                <MdFavorite
                    size={40}
                    color={clickedLikes ? '#D65076' : '#fff'}
                    className={clickedLikes ? 'animate__animated animate__heartBeat' : ''}
                />
                <p>{likes}</p>
            </div>
        </div>
    )
}

export default Sidebar
To record the new data, we need to update the video by making an API call
// src/pages/api/videos/index.ts
// On the backend, we use the nodejs client and call the update method

import ApiVideoClient from '@api.video/nodejs-client'
import { NextApiRequest, NextApiResponse } from 'next'

const handler = async (req: NextApiRequest, res: NextApiResponse) => {
    const defaultApiKey = process.env.API_KEY

    const { videoId, metadata } = req.body

    const client = new ApiVideoClient({
        apiKey: defaultApiKey,
    })

    const videoUpdatePayload = {metadata}
    const result = await client.videos.update(videoId, videoUpdatePayload)
    res.status(204).send(result)
    return

}
export default handler
Note: Find a full description of the upload method here.
Follow our latest news by subscribing to our newsletter
Create your free account
Start building with video now


