Create an infinite scrolling wall of holiday videos with Laravel 8
December 9, 2021 - Erikka Innes in Video list, PHP
Today we'll learn how to grab video data from api.video, add it to a database, then use that information to create an infinite wall of videos that you can keep scrolling through.
For this project, we're going to also use Laravel 8.
Prerequisites
- api.video account - Register here
- Laravel 8 installed
- api.video PHP client
- Symfony HTTP client -
composer require symfony/http-client - composer - https://getcomposer.org/
What you'll be doing
You have three tasks for this project: 1. Retrieve your data from api.video 2. Add your data to your database 3. Set up your page to show the videos in an infinite scroll
Retrieve your data
You need to collect some data from api.video about the videos you're going to use. To keep it simple, for this walkthrough I'm just retrieving videos tagged 'holiday' and keeping the title, video ID, and MP4 link for each one. You can retain any information you might want to use or display, the most important thing is the MP4 link.
For this part of the project, I didn't use Laravel 8, I just set up a php file with my code and used composer.
<?php
require __DIR__ .'/vendor/autoload.php';

use Symfony\Component\HttpClient\Psr18Client;
use ApiVideo\Client\Client;
use ApiVideo\Client\Model\VideoCreationPayload;

$apiKey = 'your API key here';
$apiVideoEndpoint = 'https://ws.api.video';
$httpClient = new \Symfony\Component\HttpClient\Psr18Client();
$client = new ApiVideo\Client\Client(
    $apiVideoEndpoint,
    $apiKey,
    $httpClient
);

$response = $client->videos()->list(['tags' => ['holiday']]);

$file = fopen('holiday.csv', 'w');
fputcsv($file, array('Title', 'Video ID', 'MP4 Link'));
foreach($response->getData() as $video) {
    $myVid[0]=$video->getTitle().' , '.$video->getVideoId().' , '.$video->getAssets()->getMp4();
    fwrite($file, $myVid[0]."\n");

}
fclose($file);
After you run the code, you'll have a list of all videos from your account that you tagged holiday in a .csv file. Save the file, we'll use it for the next part of our project.
Set up your project
Now it's time to set up our Laravel 8 project. We'll need this before we can do anything with our database. These instructions are for Macs.
Make a new project by opening a terminal in the place where you want to store your project by typing
laravel new holiday.Install the api.video PHP client.
composer require api-video/php-api-clientInstall the Symfony HTTP client.
composer require symfony/http-clientGo into your project and find the .env file. For the section that starts DB_ delete every DB_ item except for DB_CONNECTION. Set DB_CONNECTION to sqlite.
DB_CONNECTION=sqliteCreate a database table for the .csv file we made.
php artisan make:migration create_holidays_tableGo into your project in the database folder and open the migrations folder. There should be a .php file with a timestamp at the start followed by the name of the table you just created in the terminal. Open this file and paste in this code:
<?php

use Illuminate\Database\Migrations\Migration;
use Illuminate\Database\Schema\Blueprint;
use Illuminate\Support\Facades\Schema;

class CreateHolidaysTable extends Migration
{
    /**
     * Run the migrations.
     *
     * @return void
     */
    public function up()
    {
        Schema::create('holidays', function (Blueprint $table) {
            $table->id();
            $table->string('Title');
            $table->string('Video_ID');
            $table->string('MP4_Link');
            $table->timestamps();
        });
    }

    /**
     * Reverse the migrations.
     *
     * @return void
     */
    public function down()
    {
        Schema::dropIfExists('holidays');
    }
}
Migrate your new table.
php artisan:migrateNow we're going to create two models. The first is for handling infinite scroll.
php artisan make:model Model/InfiniteScrollAfter you've made this model, go find it in your project and paste in this code:
<?php

namespace App\Model;

use Illuminate\Database\Eloquent\Model;

class InfiniteScroll extends Model
{
    protected $table = 'holidays';
}
The second model we're going to make is for setting up our Holidays table contents.
php artisan make:model Model/HolidayNavigate to your new Holiday model and paste in this code:
<?php

namespace App\Model;

use Illuminate\Database\Eloquent\Factories\HasFactory;
use Illuminate\Database\Eloquent\Model;

class Holiday extends Model
{
    use HasFactory;

    protected $fillable = [
        'Title', 'Video_ID', 'MP4_Link'
    ];
}
Let's create a seeder that we can use to populate our new table using our .csv file.
php artisan make:seeder HolidaySeederTake your .csv file and place in the data folder for your database.
Go to the seeders folder and open your HolidaySeeder.php file. Paste in this code:
<?php

namespace Database\Seeders;

use Illuminate\Database\Seeder;
use App\Model\Holiday;

class HolidaySeeder extends Seeder
{
    /**
     * Run the database seeds.
     *
     * @return void
     */
    public function run()
    {
        Holiday::truncate();

        $csvFile = fopen(base_path("database/data/holiday.csv"), "r");

        $firstline = true;
        while (($data = fgetcsv($csvFile, 2000, ",")) !== FALSE) {
            if (!$firstline) {
                Holiday::create([
                    "Title" => $data['0'],
                    "Video_ID" => $data['1'],
                    "MP4_Link" => $data['2']
                ]);
            }
            $firstline = false;
        }

        fclose($csvFile);
    }
}
- Now we can run our seeder!
php artisan db:seed --class=HolidaySeederThis should populate your database with the information from your .csv file. We're ready to set up our page to display our video collection.
Display videos
In this section we'll set up routes, a controller, and the page that will display videos whose links are retrieved from our database.
We're going to add a new route, but before we do that, navigate to RouteServiceProvider.php. Scroll down to the line that reads
protected $namespace = 'App\\Http\\Controllers';- it's probably commented out. Remove the commenting so it is active again.Navigate to routes\web.php. Add a new route
Route::get('/load-more-data', 'VideoController@InfiniteScroll' );Make a new controller.
php artisan make:controller VideoControllerNavigate to Controllers and open your VideoController file. Paste in this code:
<?php

namespace App\Http\Controllers;
use Illuminate\Http\Request;
use App\Model\InfiniteScroll;

class VideoController extends Controller
{
    public function InfiniteScroll(Request $request)
    {
        $posts = InfiniteScroll::paginate(5);
        if($request->ajax()){
            $view = view('data',compact('posts'))->render();
            return response()->json(['html'=>$view]);
        }
        return view('holidayView', compact('posts'));
    }
}
- Now let's set up our blade file. Navigate to views and craete a new blade file called holidayView.blade.php. Open the new file and paste this in:
<!DOCTYPE html>
<html lang="en">
<head>
    <title>Post List Data</title>
    <meta charset="utf-8">
    <meta name="viewport" content="width=device-width, initial-scale=1">
    <link rel="stylesheet" href="https://maxcdn.bootstrapcdn.com/bootstrap/4.5.2/css/bootstrap.min.css">
    <script src="https://ajax.googleapis.com/ajax/libs/jquery/3.5.1/jquery.min.js"></script>
    <script src="https://cdnjs.cloudflare.com/ajax/libs/popper.js/1.16.0/umd/popper.min.js"></script>
    <script src="https://maxcdn.bootstrapcdn.com/bootstrap/4.5.2/js/bootstrap.min.js"></script>
</head>
<body>
<section>
    <div class="container">
        <div class="row">
            <div class="col-md-12">
                <h2 class="text-center">Infinite Holiday Scroll</h2>
            </div>
            <div class="col-md-12" id="post-data">
                @include('data')
            </div>
        </div>
    </div>
</section>
<div class="ajax-load text-center" style="display:none">
    <p><img src="{{asset('img/loaderImg.gif')}}">Load More Post...</p>
</div>
</body>
</html>

<script>
    function loadMoreData(page)
    {
        $.ajax({
            url:'?page=' + page,
            type:'get',
            beforeSend: function()
            {
                $(".ajax-load").show();
            }
        })
            .done(function(data){
                if(data.html == ""){
                    $('.ajax-load').html("No more Posts Found!");
                    return;
                }
                $('.ajax-load').hide();
                $("#post-data").append(data.html);
            })
            // Call back function
            .fail(function(jqXHR,ajaxOptions,thrownError){
                alert("Server not responding.....");
            });

    }
    //function for Scroll Event
    var page =1;
    $(window).scroll(function(){
        if($(window).scrollTop() + $(window).height() >= $(document).height()){
            page++;
            loadMoreData(page);
        }
    });
</script>
- If you don't have a data.blade.php file, create one in the same folder as your other blade files. Open data.blade.php and paste in this code:
@foreach($posts as $post)
    <div class="card" style="margin-bottom:20px;">
        <div class="card-header">
            <h3>{{ $post->Title}}</h3>
        </div>
        <div class="card-body">
            <p><iframe src="{{$post->MP4_Link}}"> </iframe></p>

        </div>
    </div>
@endforeach
Run your project
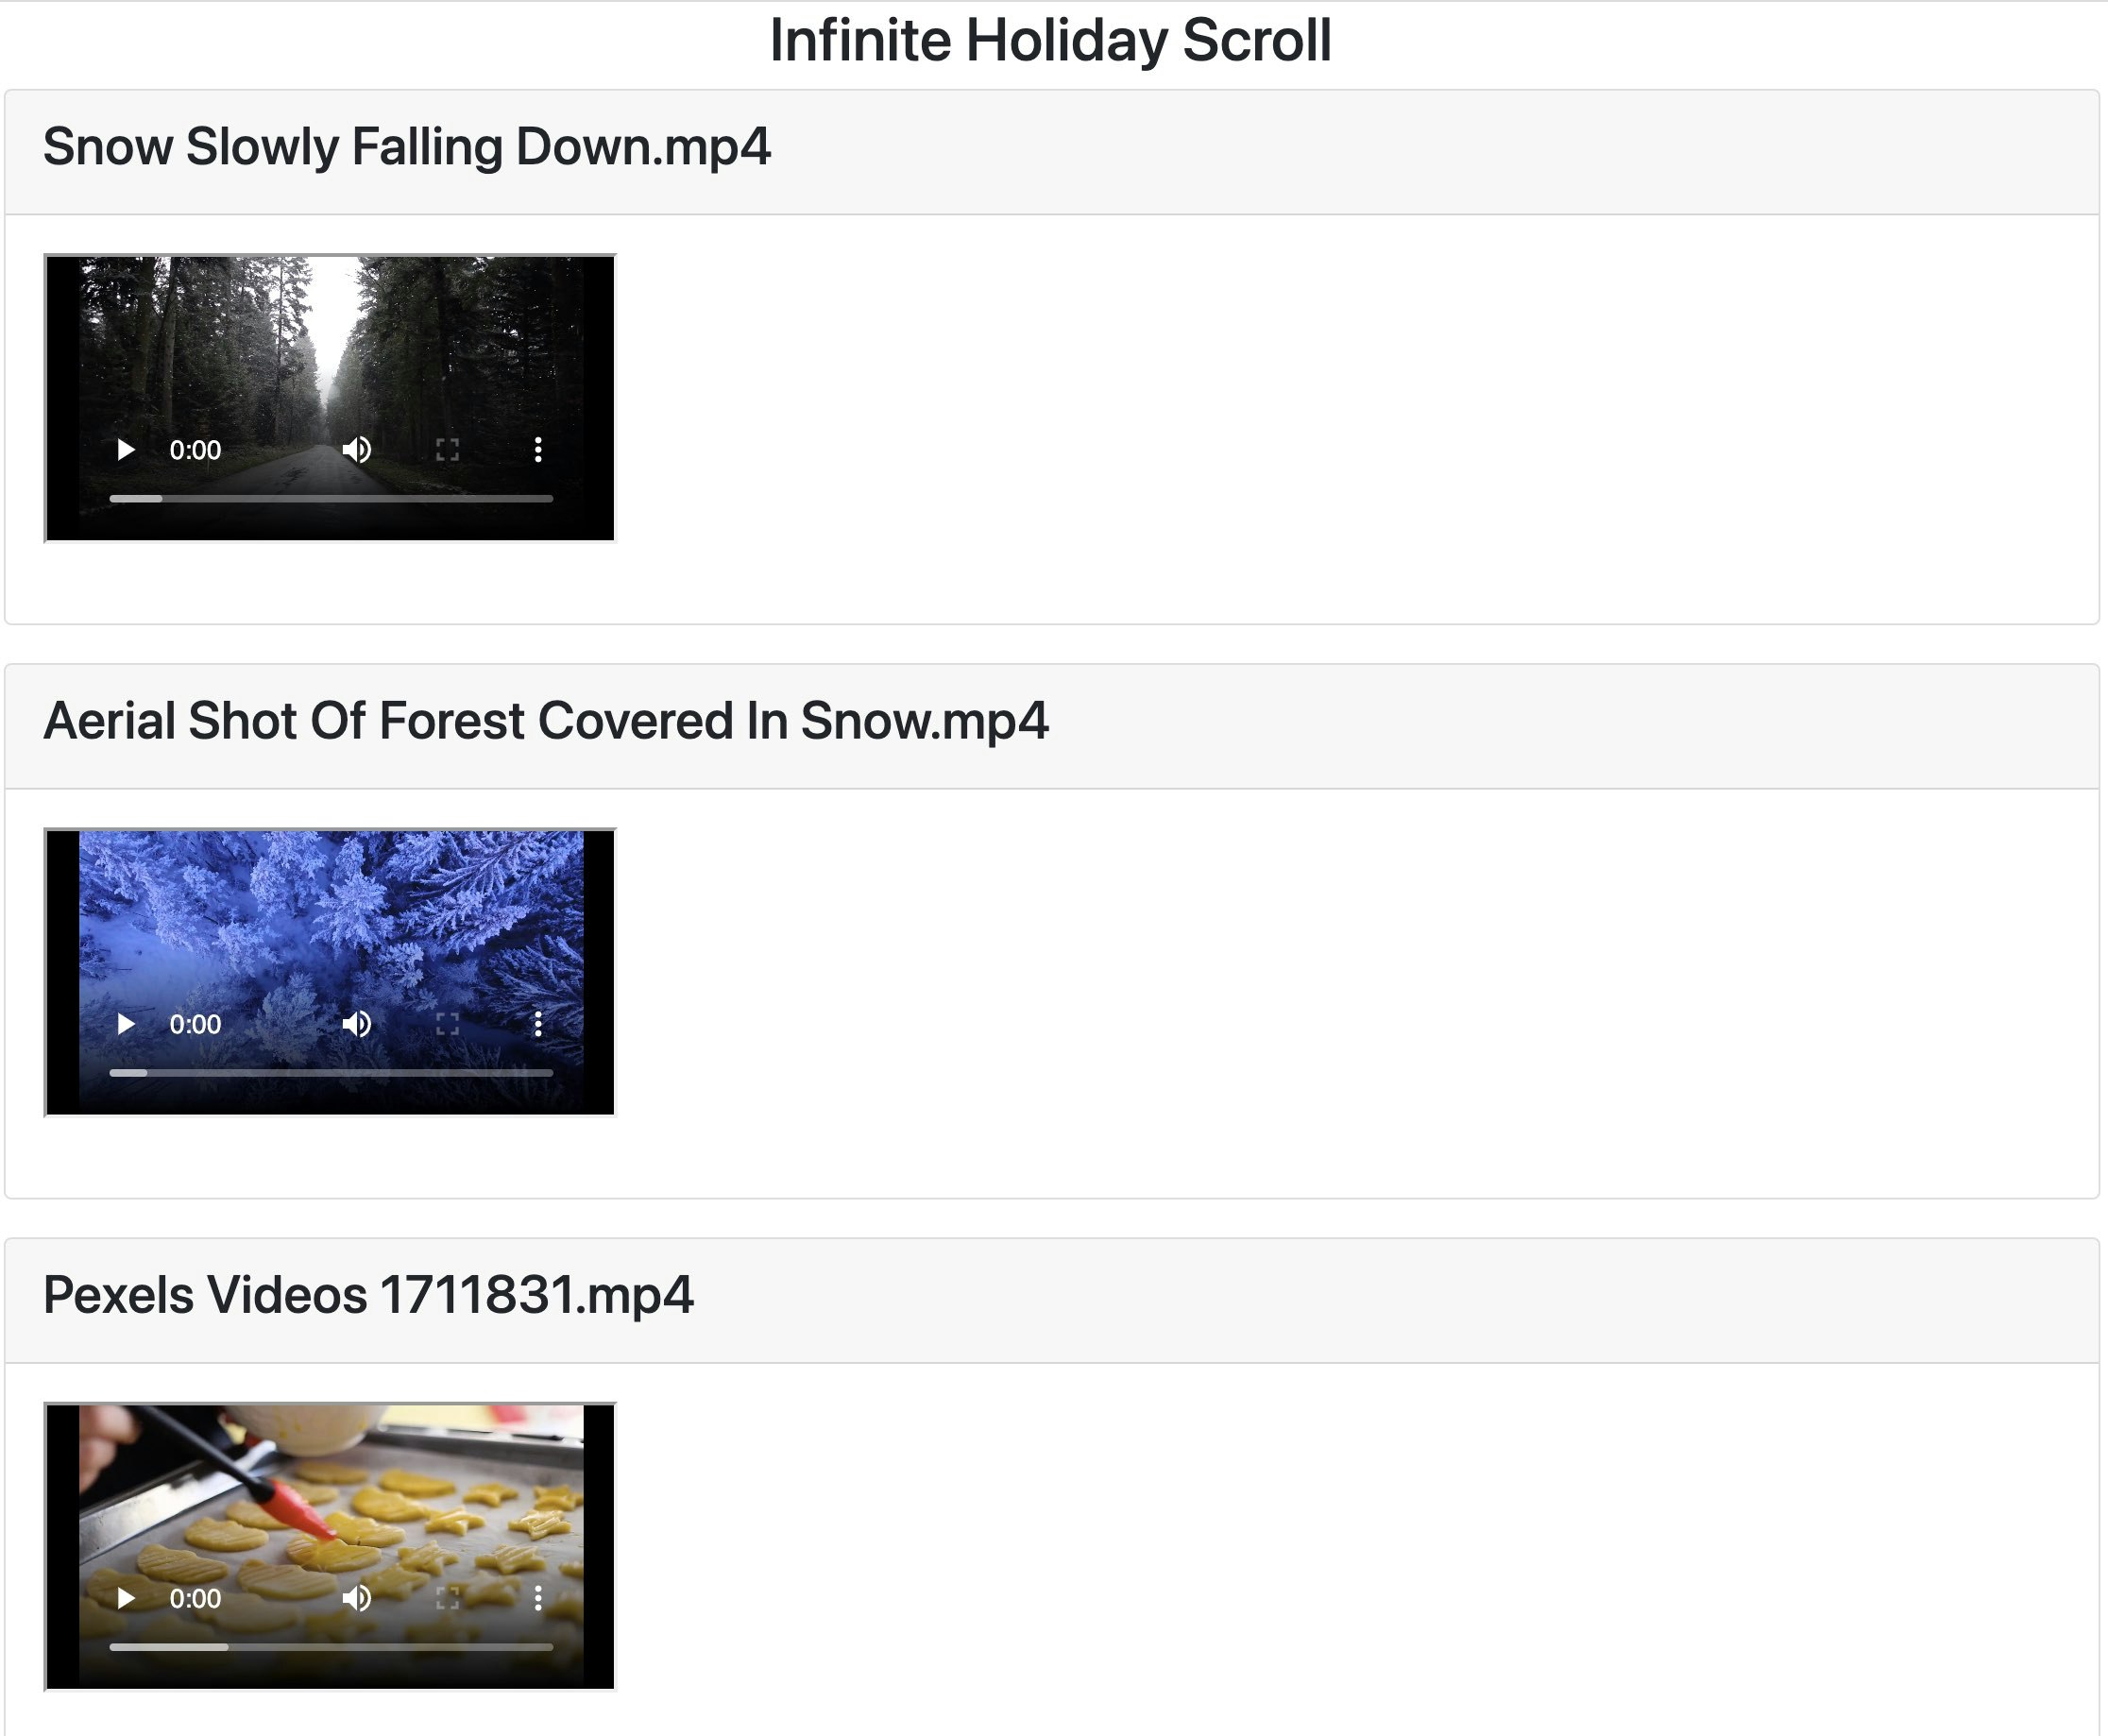
Open a terminal in your project and type php artisan serve. You should be able to see a list of scrolling videos!
If you have any questions about this tutorial, or would like to share what you've built, please join our community forum.
Erikka Innes
Developer Evangelist
Follow our latest news by subscribing to our newsletter
Create your free account
Start building with video now


